Learning how to pack a car for camping efficiently can completely change how comfortable, organized, and stress-free a camping trip feels before you even reach the campsite.
Hi, I’m Anthony.
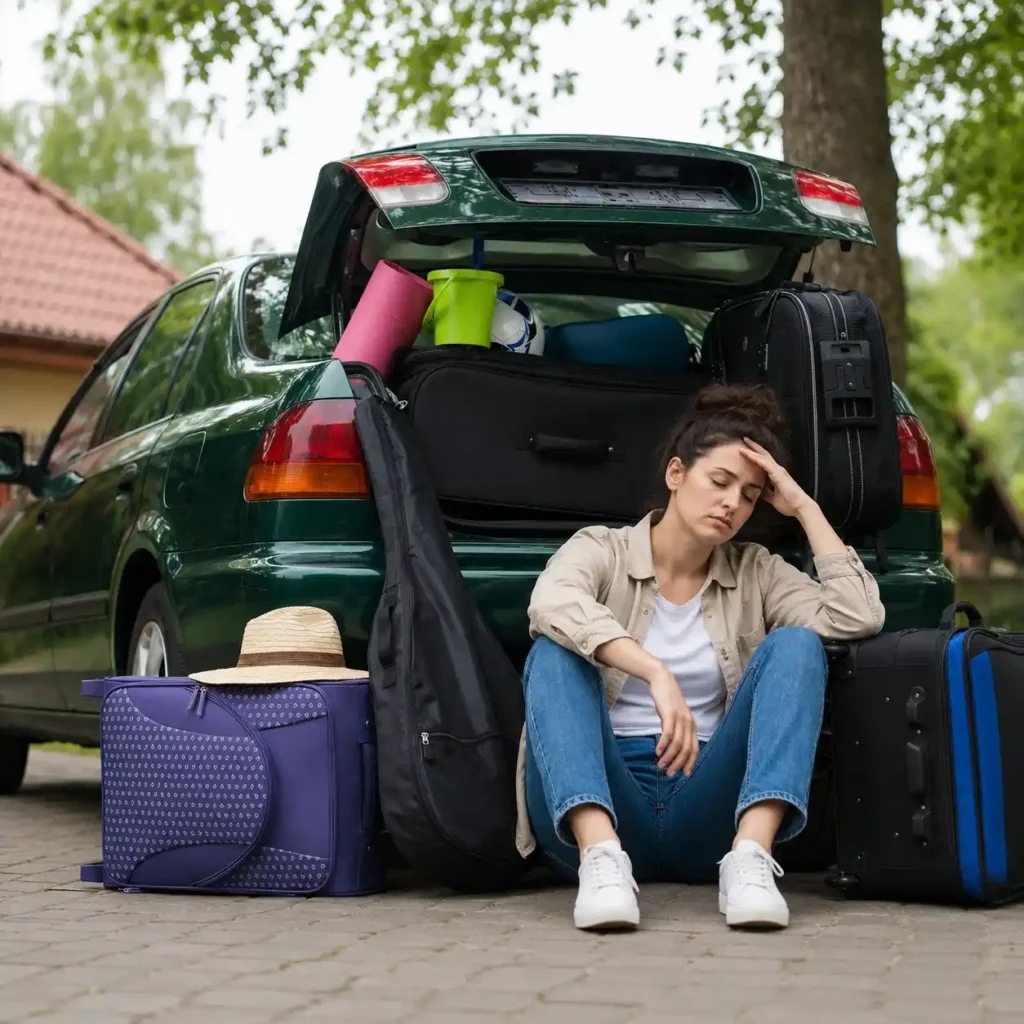
A few years ago during a rainy mountain trip in northern Idaho, I made the mistake of throwing camping gear into the SUV without any real system. The tent ended up buried under chairs and cookware, the cooler shifted during the drive, wet boots leaked onto sleeping gear, and by the time we reached camp, unloading the vehicle felt more exhausting than the drive itself.
That trip completely changed how I organize camping gear inside a vehicle.
Since then, I’ve packed everything from compact crossovers to overloaded family SUVs for weekend campground trips, cold-weather camping, long-distance road camping, and multi-day vehicle-based setups — focusing heavily on cargo accessibility, gear layering, weight distribution, moisture control, and campsite efficiency rather than simply fitting as much gear into the car as possible.
One thing became obvious very quickly: a well-packed camping vehicle does not just save space.
It makes the entire camping experience easier.
A smarter packing layout reduces setup time, keeps essential gear accessible during the drive, prevents unnecessary unloading, and helps avoid the kind of campsite chaos that happens when every item is stacked randomly on top of everything else.
This guide breaks down the real-world system I use for packing a car for camping more efficiently — particularly for campers dealing with limited cargo space, family gear overload, bad weather, or longer road trips where organization matters far more than people initially expect.
As an Amazon Associate, we earn from qualifying purchases.
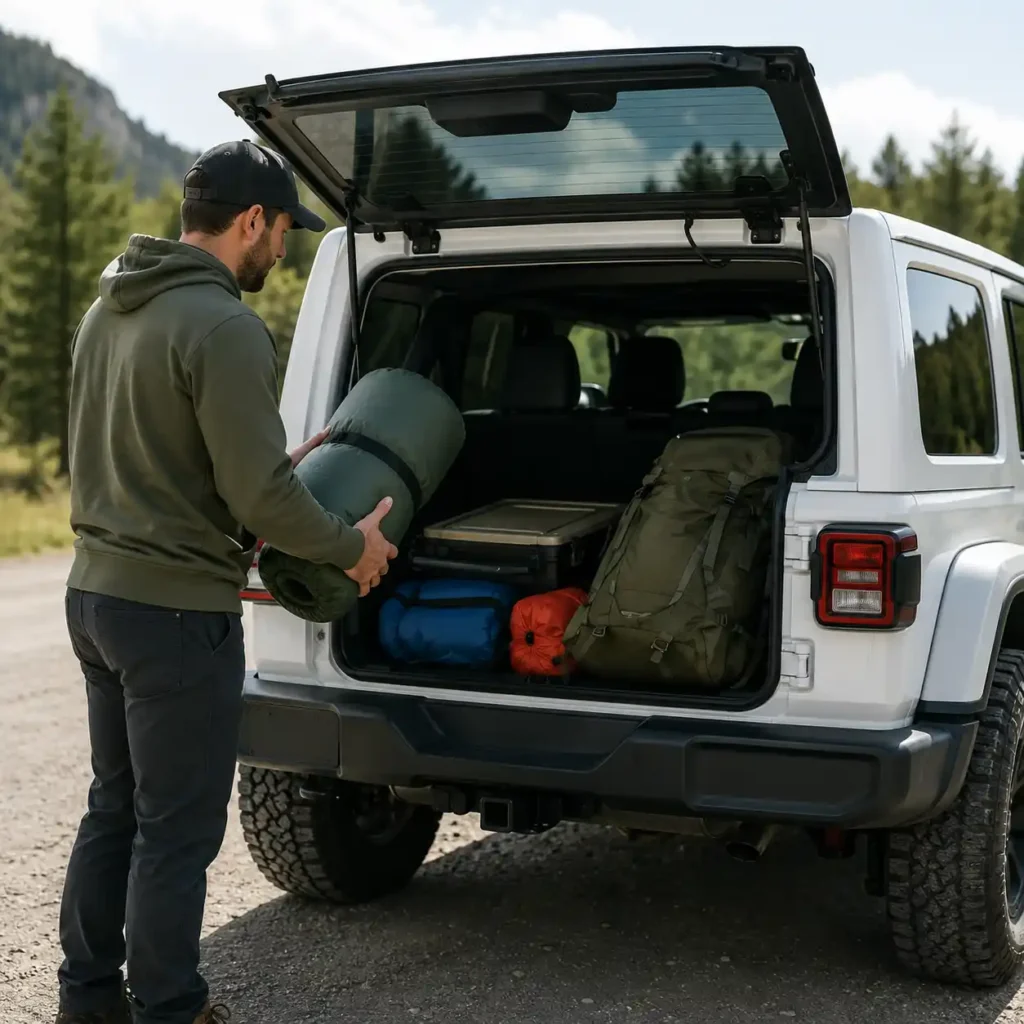
Table of Contents
🔬 How We Evaluated Car Camping Packing Systems
Packing a vehicle for camping is not just about fitting gear into empty space. A setup that looks organized in the driveway can become frustrating fast once you start driving, unloading gear at camp, or searching for important equipment after dark.
Our evaluation focused on the factors that actually affect camping efficiency, accessibility, vehicle balance, and campsite usability during real trips — not just how much equipment technically fits inside the car.
Accessibility During the Drive
Some gear needs to stay reachable throughout the trip.
We evaluated how efficiently different packing systems handled:
- quick-access food storage
- jackets and rain layers
- recovery gear
- headlamps and emergency supplies
- charging cables and electronics
- frequently used travel items
Poor accessibility usually creates the same problem: campers constantly unpack half the vehicle just to reach one small item buried beneath heavier gear.
Weight Distribution & Vehicle Stability
Overloading one side of the cargo area or stacking too much weight too high can noticeably affect how a vehicle handles during longer drives.
We paid close attention to:
- cooler positioning
- heavy gear placement
- roof-load balance
- rear suspension sag
- shifting cargo during braking
- overall driving comfort
This becomes most noticeable during mountain roads, rough campground access routes, and longer highway trips where unstable cargo movement quickly becomes annoying.
Campsite Setup Efficiency
A well-organized vehicle should make campsite setup faster — not slower.
We evaluated how different packing layouts affected:
- unloading order
- tent accessibility
- cooking setup speed
- sleeping gear organization
- wet-weather unloading
- nighttime gear retrieval
The best systems allowed the campsite to come together naturally without forcing campers to constantly reorganize gear piles during setup.
For campers already struggling with cluttered campground layouts, our guide on “How to Organize a Campsite” explains how unloading flow affects overall campsite comfort far more than most people expect.
Moisture & Dirty Gear Separation
One of the biggest vehicle-packing mistakes is allowing wet or dirty equipment to mix with sleeping gear and clean clothing.
We tested how well different layouts handled separation between:
- muddy footwear
- wet jackets
- cooking gear
- clean bedding
- electronics
- dry storage containers
This becomes especially important during rainy camping trips where moisture spreads through packed cargo areas surprisingly fast.
Space Efficiency Without Overpacking
More storage space does not automatically create a better setup.
In many cases, overloaded vehicles become harder to organize, slower to unload, and much more frustrating during multi-day camping trips.
The most efficient packing systems focused on:
- layered gear organization
- stack stability
- dead-space reduction
- accessible storage zones
- keeping non-essential equipment out of the main cargo flow
That balance matters far more than simply squeezing extra gear into every remaining gap inside the vehicle.
🧪 How We Tested Real-World Camping Packing Layouts
Packing systems often look organized before the trip starts.
The real problems usually appear later — after several hours on the road, a rainy campsite arrival, late-night gear searches, or repeated unloading during multi-day camping trips.
To evaluate what actually works, we tested different camping packing layouts across compact SUVs, midsize crossovers, pickup truck beds, and larger family vehicles during real campground travel conditions rather than controlled garage setups.
Short Weekend Trips vs Multi-Day Camping
Packing priorities change dramatically depending on trip length.
We tested how different layouts performed during:
- overnight campground trips
- long weekend camping
- multi-day road camping
- family camping with larger gear loads
- cold-weather camping setups
- mixed-weather travel conditions
Some systems worked perfectly for short trips but became frustrating once gear needed to stay organized for several consecutive days.
Fast Access During Rain & Bad Weather
Rainy arrivals expose poor packing systems almost immediately.
We specifically evaluated how quickly campers could access:
- tents
- rain jackets
- dry clothing
- lighting
- cooking equipment
- emergency gear
without unloading the entire vehicle in wet conditions.
The best layouts kept critical setup gear immediately accessible near the rear cargo opening while heavier non-essential equipment stayed deeper inside the vehicle.
For campers frequently dealing with wet-weather trips, our guide on “10 Tips for Camping in the Rain” explains why keeping setup gear dry matters far more than most campers realize before arriving at camp.
Cooler Placement & Food Access
Coolers create one of the biggest packing challenges during camping trips because they combine:
- heavy weight
- repeated access
- melting moisture
- shifting movement during driving
We tested multiple cooler positions based on:
- vehicle balance
- access convenience
- leakage containment
- unloading efficiency
- space usage around sleeping gear
Certain layouts wasted surprising amounts of cargo space while also making food access unnecessarily frustrating during longer drives.
Gear Layering & Unloading Order
One of the biggest differences between efficient and chaotic packing systems comes down to unloading sequence.
We evaluated whether campers could access:
- shelter setup gear first
- sleeping equipment second
- cooking systems afterward
- secondary storage later
without constantly reshuffling equipment piles around the campsite.
That setup flow becomes especially important after dark, during bad weather, or when arriving at crowded campgrounds with limited unloading space.
Long-Drive Comfort & Interior Clutter
Overpacked vehicles affect more than just organization.
We also evaluated how packing layouts impacted:
- passenger comfort
- rear visibility
- driving fatigue
- cabin clutter
- loose-item movement
- quick-stop convenience during road travel
A vehicle that feels manageable during a one-hour drive can become exhausting during a full-day camping road trip once gear starts shifting, collapsing, or blocking access to important travel items.
For campers trying to improve overall road-trip comfort, our guide on internal linking to “Best Rooftop Cargo Boxes for Camping Gear” explains when exterior cargo storage actually improves campsite organization instead of simply adding more clutter.
🛡️ Why You Can Trust This Guide
CampComfortGuide is fully independent. We do not organize camping packing systems around sponsorships, brand partnerships, or unrealistic “Instagram-perfect” vehicle setups that only work for staged photos and empty campgrounds.
Everything in this guide comes from real camping trips where packed vehicles had to function in actual outdoor conditions — including rainy arrivals, overloaded family camping weekends, cold-weather road trips, tight campground parking spaces, and long drives where poor organization can become frustrating fast.
Over the years, I’ve learned that efficient vehicle packing has very little to do with owning the biggest SUV or buying expensive storage accessories.
Most camping organization problems come from:
- poor gear layering
- bad unloading sequence
- inaccessible essentials
- unstable cargo stacking
- moisture spreading into sleeping gear
- wasted dead space inside the vehicle
And those problems usually become obvious at the worst possible moment — after dark, during rain, or when the campsite needs to be set up quickly.
This guide focuses heavily on the things most generic camping packing articles barely talk about:
- how weight placement affects driving comfort
- where coolers should actually go
- how to separate wet gear from dry storage
- which items should stay reachable during the drive
- how campsite setup flow changes packing strategy
- why overloaded vehicles often feel harder to manage than smaller organized setups
We also tested packing systems across different camping styles because vehicle organization changes dramatically depending on the trip itself.
A compact crossover packed for a solo weekend looks completely different from:
- family campground camping
- cold-weather vehicle setups
- multi-day road camping
- dog-friendly camping trips
- rooftop tent travel
For campers building larger vehicle-based systems, our guide on “Best Roof Setup for Camping” explains how roof racks, rooftop storage, and cargo positioning affect vehicle organization far more than many people expect.
And if your camping gear constantly turns into clutter between trips, our guide on internal linking to “How to Store Camping Gear Properly” pairs especially well with long-term organization systems that make packing faster before every trip.
The goal of this guide is simple:
Help campers build a packing system that feels organized, accessible, stable, and realistically usable once the road trip actually starts — not just something that looks tidy for five minutes in the driveway.
🚗 Why Camping Vehicles Become Disorganized So Fast
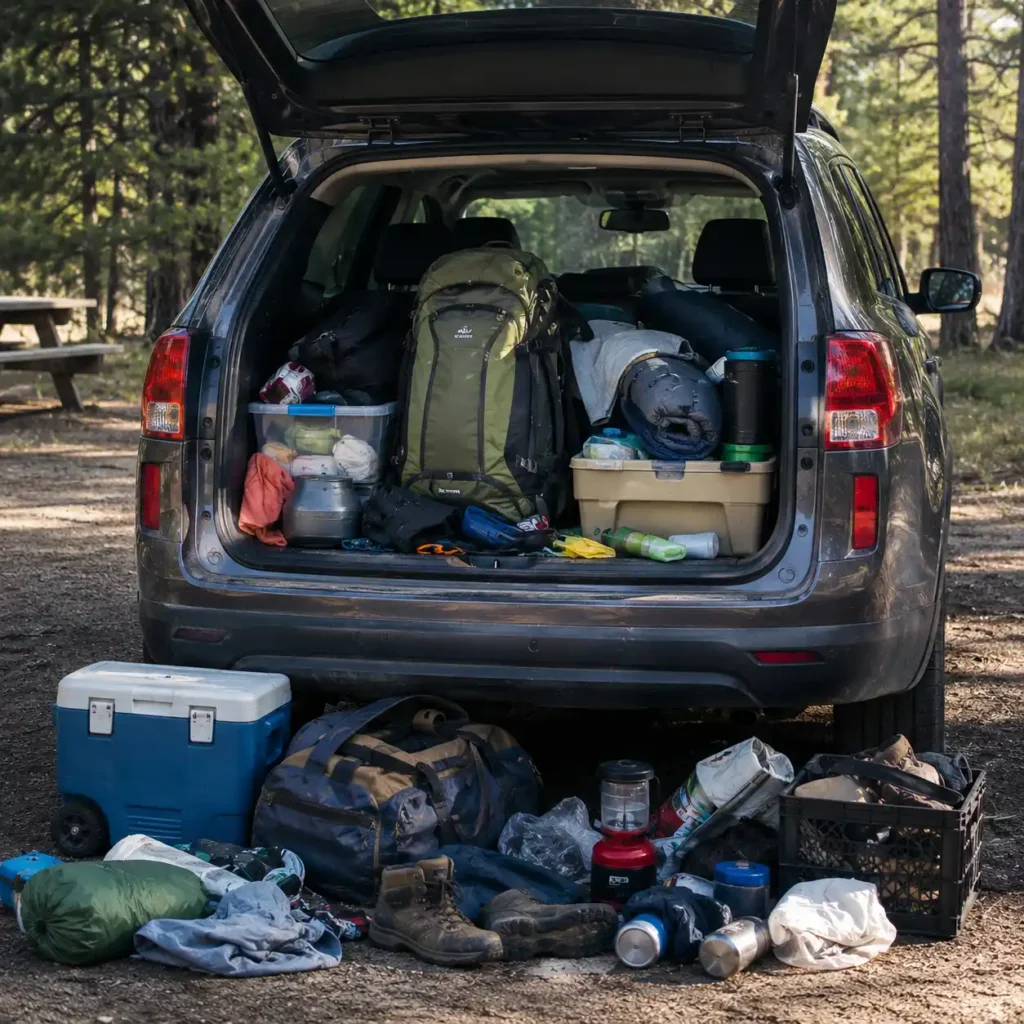
Most camping vehicles do not become messy because campers bring too much gear.
They become chaotic because the packing system itself breaks down after the trip starts.
A vehicle can look perfectly organized in the driveway, then turn into a frustrating pile of shifting equipment after a few hours on the road once coolers slide, jackets get buried, cooking gear mixes with sleeping equipment, and wet items begin spreading moisture through the cargo area.
Most vehicle setups don’t fall apart immediately. The problems usually start a few hours into the drive once gear begins shifting and important items disappear beneath larger storage piles.
Many campers pack gear based on whatever fits first rather than organizing equipment around:
- unloading priority
- weight balance
- weather exposure
- accessibility during the drive
- campsite setup sequence
That creates constant friction throughout the trip.
Heavy Gear Gets Packed in the Wrong Areas
One of the most common mistakes is placing coolers, water containers, and storage boxes too high or too far forward inside the cargo area.
That usually leads to:
- unstable shifting during braking
- blocked access to important equipment
- unnecessary unloading at camp
- poor rear visibility
- wasted lower cargo space
Heavier equipment should almost always stay lower and closer to the vehicle floor whenever possible.
For campers carrying larger power systems or cooking setups, our guide on “What Size Portable Power Station Do I Need for Camping?” explains why oversized gear creates more packing problems than many people expect during vehicle-based trips.
Camp Setup Gear Gets Buried First
Another major problem appears during campsite arrival.
Many campers accidentally bury the exact gear they need immediately after parking:
- tents
- rainflys
- headlamps
- camp chairs
- jackets
- ground tarps
That forces unnecessary unloading before the campsite can even begin taking shape.
Efficient packing systems always prioritize first-access equipment near the rear cargo opening.
For campers using larger shelter systems, our guide on “What Is a Tent Footprint?” explains why ground protection gear should stay easy to reach during wet campsite arrivals.
Moisture Spreads Faster Than Most Campers Expect
Wet boots, damp jackets, muddy stakes, and condensation-covered rainflies can spread moisture surprisingly quickly through a packed vehicle.
Once sleeping bags or clean clothing absorb that moisture, campsite comfort usually drops fast.
That becomes especially noticeable during:
- rainy campground setups
- cold-weather camping
- multi-day road trips
- family camping with limited cargo space
The most efficient setups separate clean gear zones and dirty gear zones from the beginning instead of trying to reorganize later at camp.
Overpacking Creates More Problems Than Small Vehicles
Many campers assume a larger SUV automatically solves organization problems.
Usually the opposite happens.
Extra cargo space often encourages:
- unnecessary gear
- duplicate equipment
- poor stacking discipline
- cluttered unloading flow
- inaccessible storage
A smaller well-organized vehicle almost always feels easier to manage than an overloaded SUV packed without a clear system.
For campers constantly struggling with excess gear, our guide on “Car Camping Essentials Checklist” helps reduce unnecessary equipment that takes up space without improving campsite comfort.
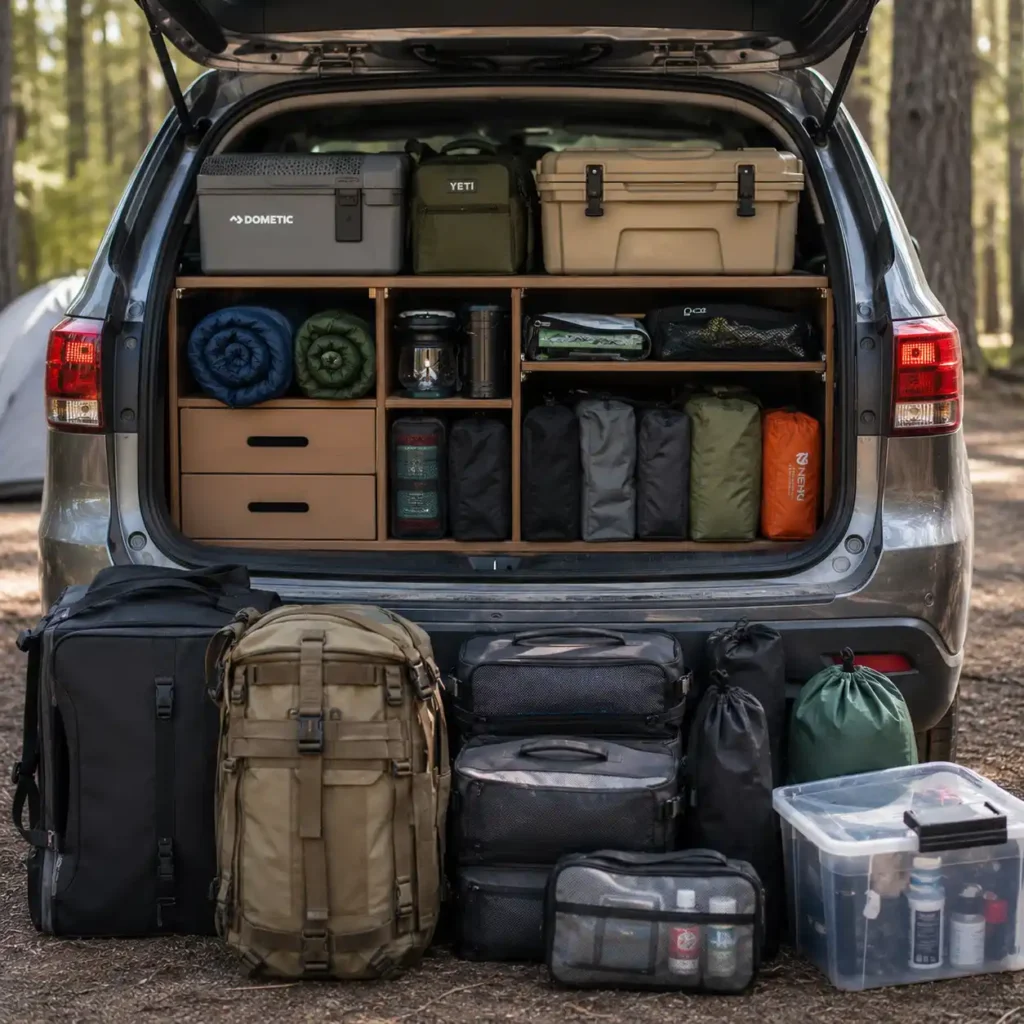
📦 The Smartest Way to Organize Camping Gear Inside a Vehicle
The easiest way to pack a camping vehicle efficiently is to stop thinking about gear as one giant pile of equipment.
Instead, the vehicle should function in organized access layers.
Every item inside the car should have a reason for being in that exact position based on:
- how often it gets used
- how heavy it is
- whether it stays dry or dirty
- when it becomes necessary during camp setup
- how quickly it may need to be accessed during the drive
That system immediately reduces clutter, unloading frustration, and wasted cargo space.
Layer 1: Immediate-Access Drive Essentials
These are the items that should stay reachable without unloading the vehicle.
Usually that includes:
- rain jackets
- snacks and drinks
- headlamps
- charging cables
- first aid supplies
- recovery gear
- medications
- navigation items
Many campers accidentally bury these essentials beneath larger camping bins, which creates constant frustration during fuel stops, weather changes, or nighttime arrivals.
A small dedicated front-seat or rear-seat access bag usually works far better than scattering these items throughout the vehicle.
For campers building more organized emergency systems, our guide on “5 Best Camping First Aid Kits in 2026” explains which compact medical kits work best for vehicle-accessible storage.
Layer 2: First-Unload Campsite Gear
The second layer should contain the equipment needed immediately after parking at camp.
That usually means:
- tent
- ground tarp
- camp chairs
- lighting
- shelter stakes
- rainfly
- quick-access clothing layers
This gear should stay closest to the rear cargo opening whenever possible.
The faster a campsite can begin taking shape after arrival, the easier the entire setup process becomes — especially during rain, cold weather, or late-evening arrivals.
For campers struggling with unstable tent setups during rough campground terrain, our guide on “7 Best Tent Stakes for Hard Ground” explains why proper stake access matters more than many people realize after arriving at camp.
Layer 3: Heavy Stable Storage
Heavy equipment should stay low and stable inside the vehicle.
That typically includes:
- coolers
- water containers
- camp kitchen bins
- portable power stations
- cookware storage
- tool kits
These items create the foundation of the packing layout.
Keeping heavy gear lower improves:
- vehicle balance
- braking stability
- cargo security
- unloading efficiency
It also prevents fragile gear from getting crushed underneath shifting equipment during long drives.
Layer 4: Soft Compressible Gear
Softer equipment works best as flexible filler around larger storage zones.
That usually includes:
- sleeping bags
- blankets
- jackets
- pillows
- extra clothing
- soft storage cubes
These items help eliminate wasted dead space while also protecting more fragile gear from movement during driving.
The key is avoiding random stuffing.
Once soft gear gets thrown loosely into open spaces, the entire packing layout usually starts collapsing after a few hours on the road.
Layer 5: Dirty & Wet Isolation Zone
One of the smartest upgrades any camper can make is creating a dedicated dirty gear zone.
This area should stay completely separate from clean sleeping equipment whenever possible.
Usually that includes:
- muddy footwear
- wet rainflies
- damp jackets
- cooking cleanup gear
- dirty ground tarps
- trash storage
Simple waterproof bins or sealed cargo bags dramatically reduce how much moisture and dirt spread through the rest of the vehicle during multi-day trips.
For campers dealing with muddy campground conditions, our guide on “5 Best Ground Mats for Muddy Campsites” explains how reducing dirt at camp also keeps vehicle interiors significantly cleaner throughout longer trips.
⚖️ Where Heavy Camping Gear Should Actually Go
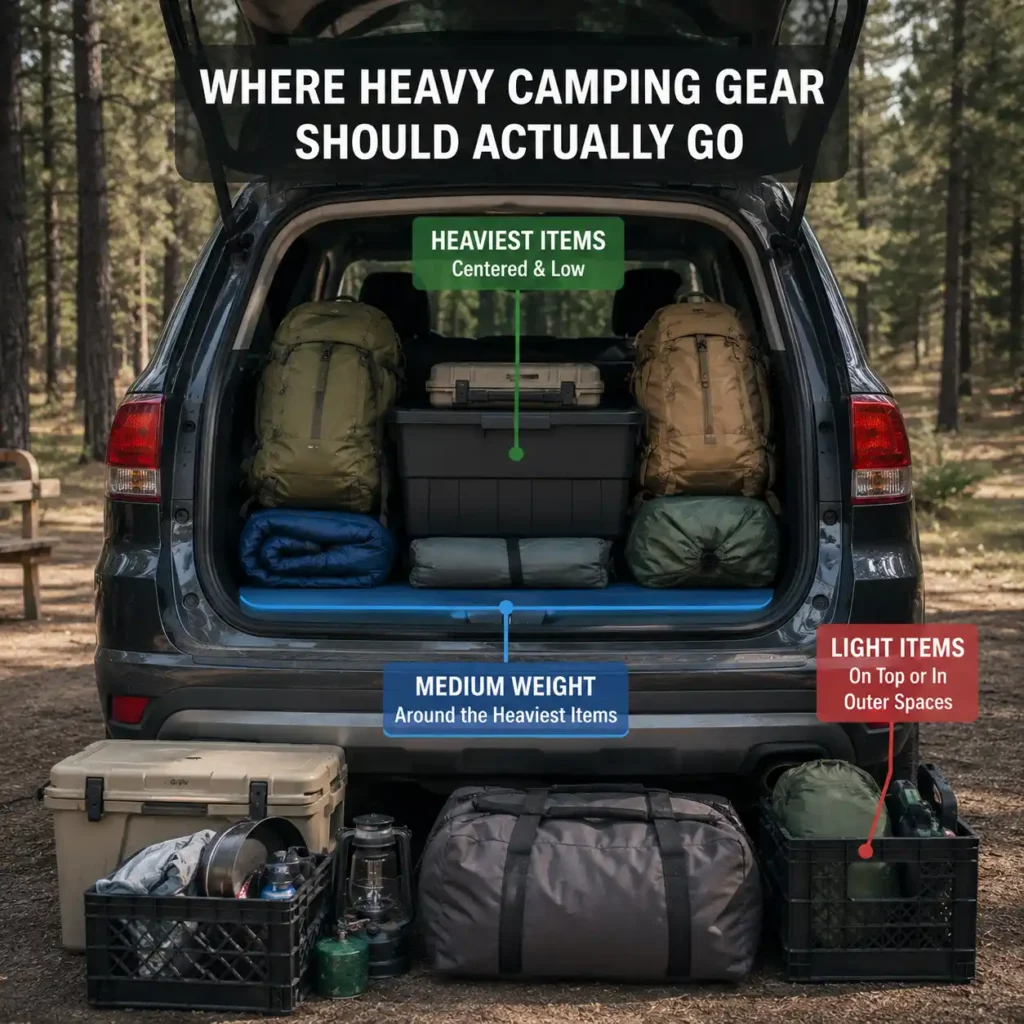
One of the fastest ways to ruin a camping vehicle setup is placing heavy gear in the wrong part of the car.
A vehicle may still “fit everything,” but poor weight placement quickly creates:
- unstable cargo shifting
- difficult unloading
- blocked access to essentials
- suspension sag
- rear visibility problems
- frustrating campsite setup flow
A vehicle can technically “fit” a huge amount of camping gear and still feel terrible to drive once the weight starts shifting during braking or rough roads.
The better approach is focusing on weight stability first and cargo volume second.
Coolers Should Stay Low — Not Stacked High
Coolers are usually the heaviest item inside a camping vehicle once ice, food, and drinks are fully loaded.
Stacking them too high creates several problems immediately:
- cargo movement during braking
- difficult food access
- crushed soft gear
- unstable stacking pressure
- leaking water spreading downward
The best location is usually:
- low inside the cargo area
- near the rear opening
- secured against side movement
- separated from sleeping gear whenever possible
This keeps food access simple while also improving overall vehicle balance during longer drives.
For campers constantly dealing with melted ice and leaking storage problems, our guide on “5 Best Camping Coolers for Ice Retention” explains which cooler designs stay cleaner and easier to manage during multi-day trips.
Water Containers Should Never Sit Above Soft Gear
Large water storage creates hidden packing problems because even small leaks spread quickly through sleeping systems and clothing.
Water containers work best when stored:
- upright
- low to the vehicle floor
- near hard-sided storage
- away from electronics
- away from bedding and pillows
Many campers accidentally place water jugs on top of blankets or sleeping bags simply because the shape fits.
That usually becomes a mistake after the first rough road section or sharp braking stop.
Camp Kitchen Gear Needs Stable Positioning
Cooking bins, propane systems, cookware, and food storage tend to shift constantly unless packed tightly against stable surfaces.
Loose kitchen equipment becomes especially frustrating during:
- mountain roads
- gravel campground access
- long highway drives
- repeated unloading during multi-day trips
The most efficient setups usually keep kitchen gear grouped together inside one dedicated cooking zone rather than spreading food items throughout the vehicle.
For campers trying to simplify cooking storage, our guide on “5 Best Camping Kitchen Organizers & Chuck Boxes” explains why compact kitchen systems dramatically improve packing efficiency during vehicle camping.
Rooftop Storage Changes Weight Distribution Completely
Roof racks and rooftop cargo boxes can free massive interior space, but poor loading creates new problems very quickly.
Heavy rooftop loading can increase:
- body roll
- highway instability
- wind noise
- fuel consumption
- difficult handling during crosswinds
Roof storage works best for:
- lighter bulky gear
- soft storage bags
- blankets
- jackets
- sleeping pads
- low-density equipment
Heavy items should almost always stay inside the vehicle whenever possible.
According to the National Highway Traffic Safety Administration (NHTSA), improperly secured cargo can affect vehicle stability, braking distance, and overall driver safety during highway travel.
For campers building larger roof-based systems, our guide on “Best Rooftop Cargo Boxes for Camping Gear” breaks down how cargo positioning affects both storage efficiency and driving comfort during longer trips.
The Best Packing Layouts Feel Predictable
The strongest vehicle setups are not necessarily the most minimal or expensive.
They simply make gear feel:
- easy to locate
- easy to access
- stable during driving
- fast to unload
- manageable during bad weather
Once heavy equipment stays anchored correctly, the rest of the packing system usually becomes dramatically easier to organize.
🌧️ How to Pack a Camping Vehicle for Rain, Mud & Bad Weather
Rainy campground arrivals tend to expose every weakness in a packing system very fast.
A vehicle that feels organized during dry driveway packing can become chaotic once the trip starts once rain starts falling, muddy gear enters the cargo area, and campers begin searching for dry equipment during a wet campsite setup.
The biggest difference between stressful rainy arrivals and smooth campground setups usually comes down to gear accessibility and moisture separation.
Keep Shelter Gear Reachable First
Nothing creates frustration faster than arriving at a rainy campsite and realizing the tent is buried beneath coolers, chairs, and storage bins.
Your shelter setup gear should always stay easy to reach first.
That usually includes:
- tent
- rainfly
- stakes
- ground tarp
- headlamps
- rain jackets
The faster the shelter goes up, the easier it becomes to protect the rest of the gear from moisture exposure.
For campers frequently setting up during storms, our guide on “How to Waterproof a Tent” explains why even quality tents can still fail once water management gets ignored during setup.
Wet Gear Needs Its Own Storage Zone
Rainy trips create moisture much faster than most campers expect.
Once wet jackets, muddy boots, and soaked rainflies mix into sleeping gear or clothing storage, the entire vehicle usually starts feeling damp and disorganized.
The simplest solution is creating a dedicated wet-storage area using:
- waterproof bins
- rubber cargo trays
- sealed duffel bags
- exterior roof storage
- washable utility containers
Even basic separation dramatically improves campsite comfort during multi-day trips.
Don’t Block Fast Clothing Access
Cold wet weather often requires clothing changes much earlier than expected.
Dry layers should never sit buried beneath cooking bins or deep cargo stacks during rainy trips.
Keep quick-access clothing reachable near:
- rear passenger seating
- upper cargo zones
- side storage pockets
- front-seat travel bags
That becomes especially important during cold-weather camping where damp clothing quickly affects overall warmth and comfort.
For campers building colder-weather vehicle systems, our guide on “How to Keep a Tent Warm” explains why moisture management affects overnight comfort far more than most people initially realize.
Mud Spreads Through Vehicles Extremely Fast
A single muddy campground arrival can turn a clean vehicle into a frustrating mess within minutes.
Most campers underestimate how fast mud spreads through a vehicle.
Efficient setups prepare for it before the trip starts.
Simple upgrades help significantly:
- dedicated shoe bins
- washable floor liners
- rear cargo mats
- separate dirty-clothing bags
- quick-access towels
- sealed trash storage
Once dirt begins spreading into bedding and soft gear, cleanup becomes much harder during the rest of the trip.
Rainy Campgrounds Punish Overpacked Vehicles
Bad weather also exposes another problem very quickly:
overpacking.
Vehicles stuffed completely full become much harder to manage once campers need:
- faster unloading
- dry workspace access
- temporary gear reshuffling
- indoor clothing changes
- protected cooking access
A slightly less crowded cargo area usually performs much better during wet camping conditions than a vehicle packed to maximum capacity.
For campers trying to build cleaner long-term storage systems between trips, our guide on “How to Store Camping Gear Properly” explains why moisture control starts long before the next campground arrival.
🚫 Common Car Camping Packing Mistakes That Create Chaos
Even large SUVs become frustrating to manage when gear gets packed without any real unloading logic.
They come from small packing mistakes that slowly make the trip harder, messier, and more frustrating after the drive begins.
Many of these problems feel minor during driveway loading — but become extremely noticeable during:
- rainy arrivals
- late-night campsite setup
- long road trips
- repeated unloading
- family camping overload
- cold-weather travel
Packing Without an Unloading Order
Many campers load gear randomly without thinking about unloading order based on whatever fits first.
That usually creates a chain reaction at camp:
- tents become buried
- cooking gear gets blocked
- chairs require full unloading
- sleeping systems end up trapped underneath heavy storage bins
Efficient vehicle setups always prioritize setup sequence first.
The gear needed immediately after parking should stay easiest to reach.
Overusing Loose Bags Instead of Structured Storage
Soft duffel bags work well for clothing and compressible gear.
But once too many loose bags get mixed together, the cargo area usually becomes difficult to manage very quickly.
That creates:
- shifting stacks
- hidden equipment
- collapsed storage zones
- wasted dead space
- constant repacking during the trip
Structured bins and clearly separated storage zones usually create much more stable vehicle organization during longer camping travel.
Letting Small Items Float Around the Vehicle
Headlamps, charging cables, pocket knives, batteries, utensils, and other small items often create surprising clutter.
Once these items lose dedicated storage locations, campers usually spend half the trip searching for them.
Small-access organizers dramatically reduce that problem.
For campers building more efficient lighting and charging systems, our guide on “5 Best Rechargeable Camping Lanterns in 2026” explains which compact lighting setups work especially well for vehicle-accessible storage.
Mixing Clean and Dirty Gear Together
This mistake destroys organization faster than almost anything else.
Wet jackets, muddy shoes, damp tarps, and dirty cookware should never sit loosely beside:
- sleeping bags
- blankets
- clean clothing
- pillows
- electronics
Once moisture and dirt spread through the cargo area, the vehicle becomes much harder to manage during the rest of the trip.
The best camping setups separate dirty gear immediately instead of trying to reorganize later.
Packing for “What If” Instead of Reality
Many campers overload vehicles with equipment they never actually use.
That usually includes:
- duplicate cooking gear
- excess clothing
- backup storage bins
- unnecessary tools
- oversized camp furniture
- extra lighting systems
Overpacking does not just waste space.
It slows down:
- loading
- unloading
- campsite setup
- food access
- daily organization
The most efficient camping vehicles usually carry less gear than people expect — but organize it far more intentionally.
For campers trying to simplify overall campsite systems, our guide on “How to Organize a Campsite” explains why fewer well-organized items almost always create a more comfortable campground experience than overloaded setups filled with unnecessary gear.
🚙 Packing Strategies for Small Cars vs SUVs vs Trucks
Not every camping vehicle creates the same packing challenges.
A compact crossover, full-size SUV, pickup truck, and wagon all force gear organization to work differently once camping equipment starts filling the cargo area.
The best packing systems adapt to the vehicle itself instead of trying to force one universal layout onto every setup.
Small Cars & Compact Crossovers
Smaller vehicles usually require the most discipline.
Limited cargo space means every item needs a clear purpose and efficient position inside the vehicle.
The biggest mistakes in compact cars usually include:
- overpacking bulky comfort gear
- stacking equipment too high
- blocking rear visibility
- mixing sleeping gear with dirty storage
- carrying duplicate equipment
Smaller vehicles work best with:
- soft-sided storage cubes
- compressible sleeping gear
- minimal kitchen systems
- tighter unloading order
- reduced “just in case” equipment
The advantage is that smaller vehicles often force better organization naturally because wasted space becomes obvious immediately.
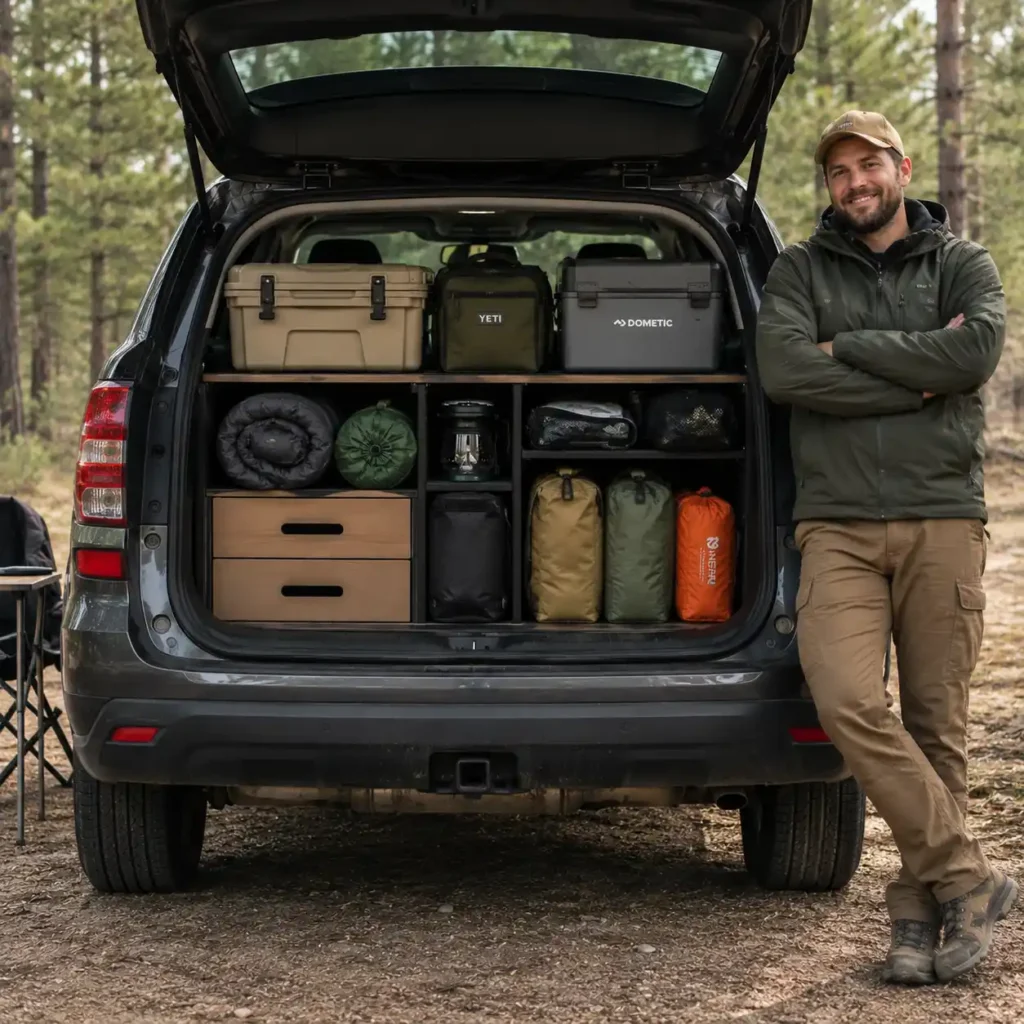
SUVs & Family Camping Vehicles
SUVs create more flexibility, but they also create more opportunities for clutter.
Extra cargo room often encourages:
- oversized coolers
- duplicate bins
- excess camp furniture
- unnecessary backup gear
- random loose storage
Family camping adds another layer because personal gear multiplies quickly once several people share the same vehicle.
The most efficient SUV setups usually separate equipment into clear zones:
- shelter setup gear
- kitchen systems
- sleeping gear
- personal clothing
- wet-storage area
- quick-access travel supplies
For campers managing larger family setups, our guide on “5 Best 6 Person Tents for Family Camping” explains how oversized shelter systems affect both packing space and campsite organization during longer trips.
Pickup Trucks & Open Bed Storage
Truck beds solve some storage problems while creating new ones.
The biggest advantages include:
- large cargo capacity
- dirty gear separation
- flexible loading space
- oversized equipment transport
But exposed storage also increases risks involving:
- rain exposure
- dust accumulation
- loose cargo shifting
- theft concerns
- difficult organization during storms
Truck setups usually work best with:
- weatherproof storage bins
- tie-down systems
- modular cargo sections
- waterproof equipment bags
- fast-access emergency storage near the cab
Without structured organization, large truck beds often become chaotic surprisingly quickly.
Roof Storage Changes Everything
Roof racks, rooftop cargo boxes, and rooftop tents dramatically change how the rest of the vehicle gets packed.
Once bulky equipment moves overhead, interior cargo areas become much easier to organize logically.
But rooftop systems also introduce:
- weight limitations
- height clearance concerns
- wind resistance
- loading complexity
- balance considerations
The most efficient setups use rooftop storage for:
- low-density bulky gear
- soft equipment
- seasonal clothing
- lighter sleeping systems
while keeping heavier daily-use equipment inside the main vehicle.
For campers building larger roof-based systems, our guide on “Best Rooftop Tents for Camping” explains how rooftop layouts completely change vehicle organization during extended camping trips.
The Best Packing System Depends on the Trip
The “perfect” camping layout changes depending on:
- trip length
- weather
- passenger count
- campsite type
- cooking setup
- sleeping system
- road conditions
The goal is not building one permanent packing arrangement.
The goal is creating a flexible system that stays:
- predictable
- accessible
- stable
- easy to unload
- manageable during bad weather
once real camping conditions begin.
⚙️ Smart Packing Upgrades That Make Camping Easier
The biggest improvements in camping organization usually come from small layout changes rather than expensive storage gadgets.
Small upgrades usually create the biggest difference once the vehicle starts getting loaded repeatedly for real trips.
The best packing improvements focus on:
- faster access
- cleaner organization
- reduced unloading frustration
- moisture control
- long-drive convenience
Use Dedicated Gear Zones Instead of Random Stacking
One of the smartest upgrades is assigning permanent “zones” inside the vehicle.
For example:
- kitchen equipment always stays together
- lighting stays inside one small organizer
- recovery gear remains near the driver area
- shelter setup gear stays near the rear opening
- wet storage stays isolated from bedding
This dramatically reduces the constant “Where did we pack that?” problem during camping trips.
The more consistent the layout becomes between trips, the faster packing and unpacking starts feeling.
Clear Storage Bins Work Better Than Opaque Containers
Transparent bins save surprising amounts of time during real camping travel.
Being able to identify:
- cookware
- charging gear
- utensils
- lighting
- repair equipment
- rain gear
without opening multiple containers makes campsite setup noticeably smoother.
Clear bins also help prevent duplicate packing because campers can immediately see what is already loaded inside the vehicle.
Soft Storage Cubes Reduce Wasted Space
Hard bins create structure, but soft storage cubes work better around irregular cargo gaps.
They are especially useful for:
- clothing
- jackets
- blankets
- smaller camping accessories
- kid gear
- quick-access layers
Soft compression storage also prevents small loose items from spreading through the cargo area during longer drives.
Labeling Helps More Than Most Campers Expect
Most campers assume they will remember where everything is packed.
That usually stops being true after dark, during rain, or after several consecutive camping days.
Simple labels make a major difference for:
- kitchen bins
- recovery gear
- first aid storage
- lighting equipment
- charging accessories
- cooking systems
This becomes even more valuable during family camping where multiple people access the same cargo zones throughout the trip.
For campers building more organized outdoor cooking systems, our guide on “5 Best Camping Kitchen Tables for Cooking” explains how better kitchen layouts reduce overall campsite clutter during longer stays.
Keep One Emergency Access Area Completely Clear
One small open-access zone inside the vehicle makes camping travel dramatically easier.
That area should stay reserved for:
- jackets
- flashlights
- first aid supplies
- quick snacks
- maps
- charging cables
- emergency tools
The mistake most campers make is gradually filling every available gap with extra gear.
Once that happens, the vehicle becomes harder to manage every single day of the trip.
Efficient Packing Should Feel Calm — Not Cramped
The best camping setups rarely look overloaded.
Even fully packed vehicles should still feel:
- accessible
- breathable
- organized
- predictable
- easy to move around inside
Once the cargo area starts feeling chaotic before the trip even begins, the organization system usually needs simplification rather than more storage accessories.
❓ FAQ: How to Pack a Car for Camping
How do you pack a car efficiently for camping?
The most efficient way to pack a camping vehicle is organizing gear by access priority instead of category alone.
Items needed immediately after arriving at camp — like the tent, rainfly, chairs, and lighting — should stay easiest to reach near the rear cargo opening, while heavier long-term storage stays lower and deeper inside the vehicle.
The best setups also separate:
- wet gear
- cooking equipment
- sleeping systems
- emergency-access items
instead of stacking everything randomly together.
What should stay easily accessible during a camping road trip?
Certain items should never be buried deep inside the cargo area during travel.
That usually includes:
- rain jackets
- snacks and drinks
- first aid supplies
- headlamps
- charging cables
- medications
- recovery tools
- maps or navigation gear
Keeping these items reachable reduces unnecessary unloading during fuel stops, weather changes, and nighttime arrivals.
Where should a cooler go when packing a camping vehicle?
Coolers work best:
- low inside the cargo area
- close to the rear opening
- secured against movement
- separated from sleeping gear whenever possible
Placing coolers too high often creates:
- shifting during braking
- leaking water problems
- crushed soft gear
- difficult food access during the drive
Is it better to use bins or duffel bags for camping gear?
The best setup usually combines both.
Hard-sided bins work better for:
- cookware
- food storage
- lighting
- tools
- cooking systems
while soft duffel bags work better for:
- clothing
- blankets
- jackets
- compressible sleeping gear
Too many loose bags usually make vehicles harder to organize during longer camping trips.
How do you keep camping gear organized during multi-day trips?
The biggest mistake campers make during longer trips is reorganizing the entire vehicle every day.
Efficient setups use:
- dedicated gear zones
- labeled storage
- wet-gear separation
- consistent unloading order
- quick-access travel storage
The more predictable the layout stays, the easier the trip becomes after several consecutive camping days.
What is the biggest mistake people make when packing for camping?
Overpacking is one of the most common problems.
Many campers bring:
- duplicate equipment
- excess clothing
- oversized coolers
- unnecessary camp furniture
- backup gear they never actually use
That usually creates more clutter, slower unloading, and harder campsite organization without improving comfort very much.
How do you pack camping gear in a small car?
Small vehicles work best when campers prioritize:
- compact storage systems
- compressible gear
- multi-use equipment
- minimal duplicate items
- vertical cargo efficiency
Smaller cars often require stricter organization, but they can still handle surprisingly comfortable camping setups when gear stays layered correctly.
Should wet camping gear stay inside the vehicle?
Only if it stays isolated from dry storage.
Wet jackets, muddy boots, soaked tarps, and damp rainflys should stay inside:
- waterproof bins
- sealed bags
- rear cargo trays
- separate dirty-gear zones
Once moisture spreads into bedding or clothing, the vehicle becomes much harder to keep comfortable during the rest of the trip.
Is rooftop storage worth it for camping?
Rooftop storage can dramatically improve interior cargo organization, especially during family camping or longer road trips.
It works best for:
- lighter bulky gear
- blankets
- jackets
- sleeping pads
- seasonal equipment
Heavy gear should usually remain inside the vehicle because excessive rooftop weight affects handling, fuel economy, and stability during highway driving.
Can you pack too much for a camping trip?
Yes — overpacking is one of the biggest reasons camping vehicles become difficult to organize during longer trips.
Too much gear usually creates:
- slower unloading
- blocked access to essentials
- shifting cargo
- cluttered campsites
- unnecessary repacking during the trip
Most experienced campers eventually focus less on carrying more equipment and more on packing gear in a cleaner, more intentional way.
What should you pack last when loading a camping vehicle?
The gear needed immediately after arriving at camp should usually be packed last so it stays easiest to access.
That often includes:
- tent
- rainflies
- camp chairs
- lighting
- jackets
- quick-access food supplies
A better unloading order usually makes campsite setup feel dramatically easier after long drives or rainy arrivals.
Why does camping gear always become messy during road trips?
Most camping vehicles become disorganized because gear gets packed around empty space instead of around accessibility and unloading sequence.
Once equipment starts shifting during the drive, small problems quickly turn into:
- buried essentials
- tangled storage
- wet gear spreading through the cargo area
- repeated unloading frustration
The most efficient setups prioritize stable gear zones and predictable access rather than simply fitting more equipment into the vehicle.
🏁 Final Verdict
Packing a car for camping efficiently has very little to do with fitting the maximum amount of gear into the vehicle.
What actually matters is building a system that stays:
- accessible
- stable
- predictable
- easy to unload
- manageable during real camping conditions
once the trip begins.
The best camping setups are usually not the most expensive or the most heavily equipped.
They are the ones that make campsite arrival feel calm instead of chaotic.
A smarter packing layout improves almost every part of the trip:
- faster setup
- cleaner organization
- easier food access
- better moisture control
- less gear shifting during driving
- fewer forgotten items
- less frustration after dark or during bad weather
Over time, most experienced campers naturally stop focusing on bringing more equipment and start focusing on bringing gear more intentionally.
That shift makes a much bigger difference than most people expect.
Whether you camp from a compact crossover, full-size SUV, truck bed, or rooftop tent setup, the goal stays the same:
Create a packing system that feels efficient enough to disappear into the background once the road trip starts.
Because the best camping vehicles are not the ones carrying the most gear.
They are the ones that make the entire trip feel easier from the moment you leave the driveway until the moment camp is fully set up.
✍️ About the Author
Anthony is the lead editor of CampComfortGuide.com and focuses on real-world camping comfort, vehicle organization, campsite efficiency, and practical outdoor gear systems built around actual camping experience rather than showroom-style product testing.
Over the years, he has packed and tested camping setups across:
- compact crossovers
- family SUVs
- truck-based camping systems
- rooftop tent setups
- cold-weather road trips
- multi-day campground travel
His guides focus heavily on the small real-world problems campers usually notice only after several long trips outdoors:
- cluttered cargo layouts
- inaccessible gear
- wet equipment management
- campsite setup frustration
- overloaded vehicle systems
- poor storage efficiency
- long-drive comfort problems
For vehicle camping specifically, Anthony pays close attention to how packing systems affect:
- unloading speed
- cargo stability
- campsite organization
- weather exposure
- daily accessibility
- overall camping comfort during extended trips
The goal is simple:
Help campers build setups that feel cleaner, calmer, easier to manage, and far less stressful once real camping conditions begin.