
How to keep food cold while camping becomes a much bigger challenge once summer heat, melting ice, warm drinks, and multi-day campground trips start pushing a cooler beyond the first 24 hours outdoors.
Hi, I’m Anthony.
A few summers ago during a hot lakeside camping trip in eastern Washington, I made the mistake of treating our cooler like most casual campers do — throwing food, drinks, ice bags, and loose groceries inside without any real system.
By the second afternoon, the ice had almost completely melted, sandwich meat was sitting in cold water, drinks were barely cool anymore, and we ended up driving nearly 30 minutes just to buy more ice at a small campground store charging ridiculous prices for half-melted bags.
That trip changed how I manage food storage while camping.
Since then, I’ve tested different cooler setups during hot-weather campground trips, multi-day car camping weekends, mountain campsites, and longer road-based camping setups — paying close attention to ice retention, cooler organization, food layering, sun exposure, drainage management, and the small mistakes that quietly destroy cold storage much faster than most campers realize.
One thing became obvious very quickly:
Keeping food cold while camping has far less to do with buying the most expensive cooler and far more to do with how the cooler is packed, organized, and managed throughout the trip.
This guide breaks down the practical strategies that actually help keep food colder longer during real camping trips — including smarter ice usage, cooler organization, food separation, drainage management, and simple campsite habits that dramatically reduce constant ice runs.
As an Amazon Associate, we earn from qualifying purchases.
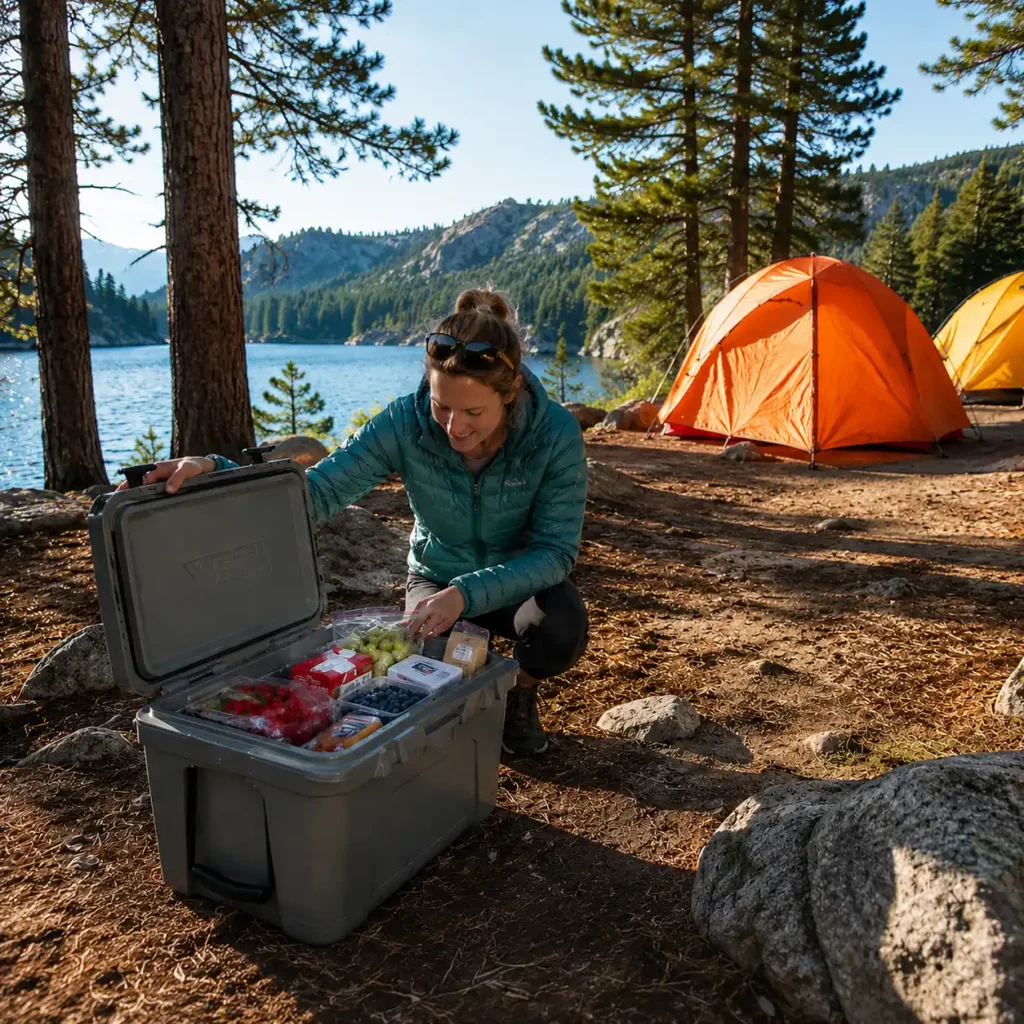
Table of Contents
How We Evaluated Cooler Performance During Camping Trips
Keeping food cold while camping is not just about how long a cooler can technically hold ice in perfect conditions.
Most coolers perform very differently once they are exposed to:
– repeated lid openings,
– direct sunlight,
– warm drinks,
– humid weather,
– melted ice water,
– and constant campground use over multiple days.
That is why this guide focuses heavily on the real factors that actually affect food temperature during camping trips — not just marketing claims printed on cooler packaging.
Ice Retention During Repeated Cooler Access
One of the biggest differences between controlled cooler testing and actual campground use is how often the cooler gets opened throughout the day.
A cooler that holds ice for “5 days” in a laboratory environment may lose cold air dramatically faster once campers repeatedly grab:
– drinks,
– cooking ingredients,
– snacks,
– condiments,
– or breakfast supplies every few hours.
We paid close attention to how different packing strategies affected:
– internal temperature stability,
– ice melt speed,
– food separation,
– and cold retention after repeated access during warmer daytime conditions.
Cooler Organization & Food Layering
Poor organization destroys ice retention surprisingly fast.
Many campers accidentally create warm zones inside the cooler by mixing:
– loose drinks,
– unpackaged food,
– partially melted ice,
– and frequently accessed items together in random layers.
We tested how smarter food separation affected:
– overall ice longevity,
– cooler drainage,
– cross-contamination risk,
– and accessibility during multi-day trips.
In many cases, cooler organization mattered more than cooler size itself.
Heat Exposure & Campsite Placement
Direct sunlight can raise internal cooler temperatures much faster than most campers expect — especially during summer campground trips where coolers sit exposed for hours beside picnic tables or inside hot vehicles.
We evaluated how placement affected:
– surface heat buildup,
– ice melt acceleration,
– cooler wall temperature,
– and food safety during hotter afternoon conditions.
Even moving a cooler into consistent shade often produced a noticeable difference by the end of the day.
For campers trying to create a more efficient cooking and food-prep layout, our guide on How to Organize a Campsite explains why campsite flow affects cooler access and food storage far more than many campers initially expect.
Ice Type & Cold Retention Efficiency
Not all ice performs equally during camping trips.
We compared:
– cube ice,
– block ice,
– frozen water bottles,
– reusable ice packs,
– and layered mixed-ice systems
to evaluate which methods actually slowed melting most effectively during multi-day campground use.
Certain combinations lasted significantly longer while also reducing excess cooler water and improving food separation throughout the trip.
For campers still choosing gear itself, our guide on 5 Best Camping Coolers for Ice Retention compares the cooler models that handled multi-day summer camping conditions best during testing.
Food Safety During Multi-Day Camping
Keeping drinks cold is one thing.
Keeping perishable food safely below unsafe temperatures during hot-weather camping is a completely different challenge.
We focused heavily on:
– raw meat separation,
– dairy protection,
– meltwater contamination,
– cooler drainage habits,
– and long-term temperature consistency during extended camping weekends.
Because once cooler temperatures begin fluctuating too aggressively, food quality usually declines much faster than most campers realize.
For campers managing larger outdoor cooking setups, our guide on Camping Food Storage Guide explains how proper food separation helps reduce spoilage, contamination risk, and campsite wildlife problems during longer trips.
Why Ice Melts So Fast During Camping Trips
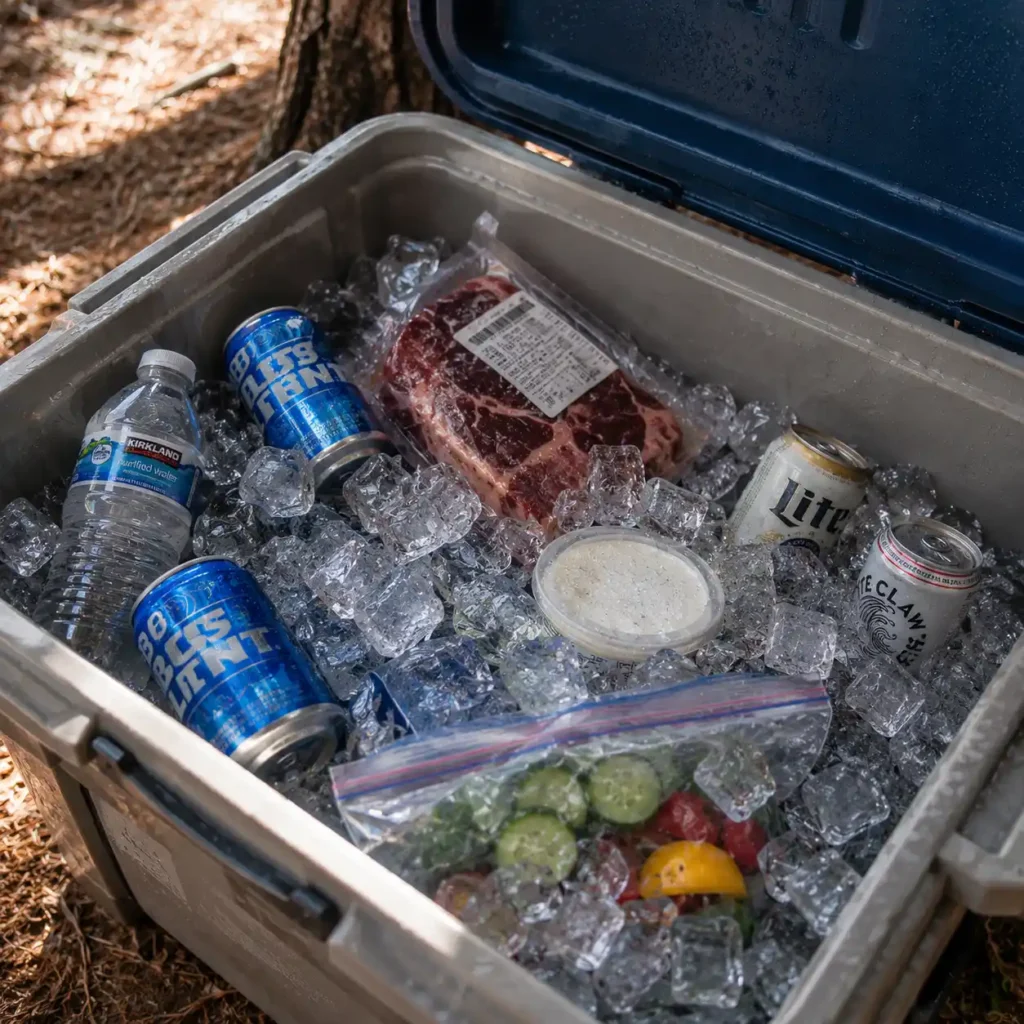
Most campers blame the cooler when ice disappears too quickly.
In reality, the cooler itself is often only part of the problem.
The biggest reason ice melts fast during camping trips is usually heat entering the cooler repeatedly throughout the day — often from small habits that seem harmless at first but quietly destroy cold retention over time.
And once campground temperatures climb into hot afternoon conditions, those mistakes compound very quickly.
Warm Food & Drinks Destroy Ice Immediately
One of the fastest ways to burn through ice is loading the cooler with:
– warm drinks,
– room-temperature groceries,
– unfrozen meat,
– or recently purchased food straight from the store.
That heat has to go somewhere.
The cooler immediately starts using ice energy to lower those temperatures first, which dramatically accelerates melting during the first several hours of the trip.
Pre-chilling food at home before departure usually makes a far bigger difference than adding extra loose ice later.
Constant Cooler Opening Releases Cold Air
Every time the lid opens, cold dense air escapes and warmer outside air enters the cooler.
Many campers unknowingly create constant temperature swings by repeatedly opening the cooler for:
– drinks,
– snacks,
– condiments,
– cooking ingredients,
– or random food searches throughout the day.
This becomes even worse when the cooler is poorly organized and campers spend extra time digging through melted ice trying to locate items buried underneath other food.
One of the smartest upgrades is separating:
– drinks,
– cooking ingredients,
– and long-term food storage
instead of forcing one cooler to handle everything at once.
For campers building more efficient outdoor cooking systems, our guide on 5 Best Camping Kitchen Organizers & Chuck Boxes explains how better food organization reduces cooler access frequency dramatically during longer campground trips.
Direct Sunlight Accelerates Surface Heat
A cooler sitting in direct sunlight all afternoon can absorb a surprising amount of external heat — especially darker-colored coolers exposed beside picnic tables, vehicles, or open campsites.
Even premium coolers lose ice much faster once outer wall temperatures rise continuously for several hours.
Simple shade management often helps more than people expect:
– under picnic tables,
– beside trees,
– under canopies,
– or inside shaded vehicle areas.
For hotter summer trips, our guide on 5 Best Portable Shade Canopies for Camping explains why campsite shade dramatically improves both food storage and overall campground comfort.
Cheap Ice Often Melts Faster Than Campers Expect
Not all ice bags perform equally.
Small gas-station cube ice tends to melt very quickly because:
– smaller cubes expose more surface area,
– thin ice melts faster,
– and partially melted bags often start warming before campers even reach camp.
Large block ice usually lasts significantly longer during multi-day trips because it melts more slowly and maintains colder internal temperatures deeper inside the cooler.
Many experienced campers combine:
– block ice for long-term cooling,
– and smaller cube ice for daily food access.
Empty Cooler Space Warms Faster
Half-empty coolers lose cold retention faster because warm air fills unused interior space every time the lid opens.
A tightly packed cooler generally stays colder longer because less warm air circulates between items inside.
This is one reason frozen water bottles work so well during camping trips:
– they reduce empty air space,
– add additional thermal mass,
– and provide cold drinking water later as they thaw.
For campers trying to improve overall campsite efficiency, our guide on How to Keep a Camp Kitchen Clean Overnight also covers food organization habits that reduce unnecessary cooler access after dark.
Best Ways to Keep Food Cold While Camping Longer
Once campers stop relying on “just adding more ice,” cooler performance usually improves dramatically.
The biggest difference comes from building a smarter cold-storage system from the beginning of the trip — especially during warmer weather where even high-end coolers can lose temperature surprisingly fast if they are managed poorly.
These are the methods that consistently made the largest difference during multi-day camping trips.
Pre-Chill Everything Before Leaving Home
This is easily one of the most overlooked cooler mistakes.
Adding room-temperature food and drinks forces the cooler to spend its ice cooling everything down first before it can even begin maintaining cold temperatures.
Whenever possible:
– refrigerate drinks overnight,
– freeze meat beforehand,
– chill dairy products fully,
– and cool the inside of the cooler itself before packing.
Even partially chilled supplies can noticeably extend ice retention during the first 24 hours outdoors.
Use Block Ice for Long-Term Cooling
Loose cube ice cools items quickly but melts much faster because of its larger exposed surface area.
Block ice usually lasts significantly longer during camping trips because:
– it melts more slowly,
– maintains colder internal temperatures,
– and reduces excess cooler water buildup.
Many experienced campers use a layered system:
– block ice on the bottom,
– cube ice near frequently accessed food,
– and frozen bottles to fill empty air gaps.
That combination often performs better than simply dumping multiple loose ice bags into the cooler.
Separate Drinks from Perishable Food
Drink coolers get opened constantly.
Food coolers should not.
One of the fastest ways to destroy cold retention is forcing a single cooler to handle:
– drinks,
– snacks,
– meal ingredients,
– condiments,
– and long-term food storage all together.
Separating beverages into a second cooler dramatically reduces temperature fluctuation inside the main food cooler.
This becomes especially important during:
– family camping trips,
– larger campsites,
– and hotter summer weekends where cooler access increases constantly throughout the day.
For larger campground cooking setups, our guide on 5 Best Camping Kitchen Tables for Cooking explains how a more organized food-prep station helps reduce repeated cooler opening during meal prep.
Keep the Cooler in Permanent Shade
Even premium coolers struggle once direct sunlight continuously heats the outer shell for several hours.
One of the easiest upgrades is simply treating cooler placement like temperature management rather than random campsite storage.
The best locations are usually:
– under picnic tables,
– beside trees,
– under shade canopies,
– or inside ventilated shaded vehicle areas.
Moving a cooler just a few feet into consistent shade often creates a surprisingly noticeable difference by evening.
Organize Food by Access Frequency
The more time campers spend searching through cooler contents, the more cold air escapes.
A smarter organization system reduces lid-open time dramatically.
We had the best results when:
– frequently used items stayed near the top,
– raw meat stayed sealed lower inside,
– breakfast foods stayed grouped together,
– and drinks remained in separate storage entirely.
Small storage containers and labeled food bags also made campground cooking much faster while reducing unnecessary cooler access throughout the day.
For campers improving their entire cooking setup, our guide on How to Keep a Camp Kitchen Clean Overnight also covers organization systems that make campsite food management much easier during longer trips.
How Experienced Campers Organize Food Inside a Cooler
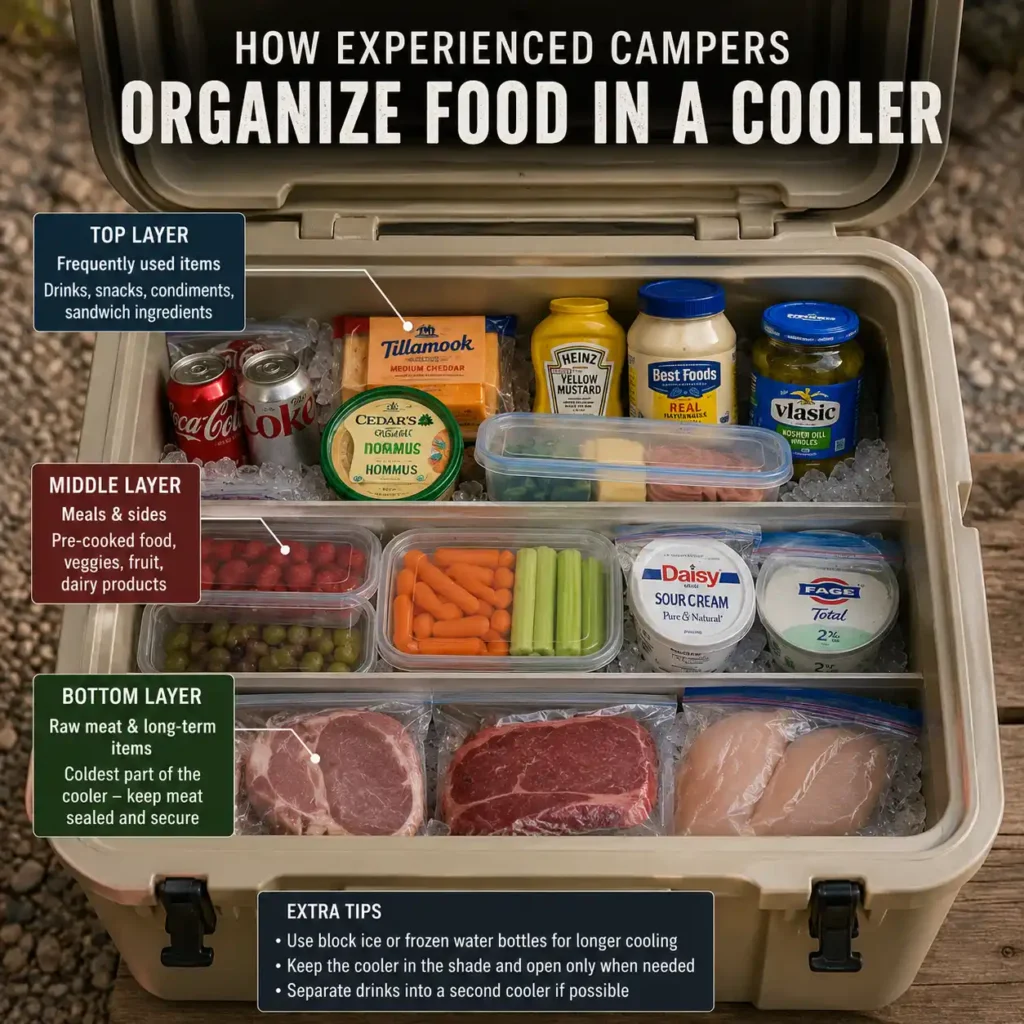
Most cooler problems start long before the ice melts.
They start with poor organization.
Once food, drinks, condiments, snacks, raw meat, and loose groceries all get thrown together inside one cooler, cold retention usually drops fast — and campground cooking becomes far more frustrating than it needs to be.
Experienced campers tend to organize coolers more like compact food-storage systems rather than simple ice boxes.
Keep Raw Meat at the Bottom
The coldest temperatures stay near the bottom of the cooler because cold air naturally sinks.
That makes the lower section the safest location for:
– raw meat,
– frozen proteins,
– and longer-term perishable food.
Keeping meat sealed at the bottom also reduces:
– cross-contamination risk,
– meltwater exposure,
– and accidental leaks during transport.
Leakproof containers or sealed freezer bags work far better than loose grocery packaging once ice begins melting.
Store Frequently Used Food Near the Top
Items that get accessed constantly should always stay easy to reach.
That usually includes:
– drinks,
– sandwich ingredients,
– snacks,
– condiments,
– breakfast foods,
– and cooking essentials.
The faster campers can grab items, the less cold air escapes during every cooler opening.
This becomes especially important during hotter summer afternoons where repeated temperature swings accelerate ice melt very quickly.
Use Small Containers Instead of Loose Packaging
Loose grocery bags create wasted space and poor airflow inside the cooler.
Smaller sealed containers help:
– organize ingredients,
– reduce water exposure,
– improve stacking,
– and speed up food access during meal prep.
They also prevent cooler chaos after the first day once ice begins shifting and partially melting.
Simple organization upgrades often make campground cooking dramatically easier during multi-day trips.
For campers building more efficient outdoor meal setups, our guide on 5 Best Camping Cookware Sets explains how compact nesting systems reduce campsite clutter and improve food-prep organization.
Separate Dry Food Completely
Bread, chips, tortillas, snacks, coffee supplies, and dry ingredients should stay completely outside the cooler whenever possible.
Mixing dry food with melting ice usually creates:
– soggy packaging,
– wasted cooler space,
– and unnecessary lid openings.
Dedicated dry-food bins or camping kitchen organizers make a major difference during longer campground stays.
Avoid “Cooler Digging”
One of the biggest signs of a poorly organized cooler is when campers spend 20–30 seconds digging through ice every single time the lid opens.
That destroys cold retention surprisingly fast.
The best cooler setups minimize:
– searching,
– rearranging,
– unpacking,
– and repeated lid-open time.
Even basic food grouping makes a noticeable difference by the second or third day of the trip.
Should You Use One Cooler or Two While Camping?
For short overnight trips, a single cooler usually works fine.
But once camping trips become:
– hotter,
– longer,
– larger,
– or more food-heavy,
many experienced campers eventually switch to a two-cooler system.
And honestly, it often makes a much bigger difference than upgrading to a more expensive cooler.
Why Single-Cooler Setups Lose Ice Faster
The biggest problem with one-cooler systems is simple:
the cooler gets opened constantly.
Every time someone grabs:
– a drink,
– snacks,
– sandwich ingredients,
– condiments,
– or cooking supplies,
cold air escapes and warmer outside air rushes inside.
Over the course of a warm campground day, those repeated temperature swings melt ice surprisingly quickly.
This becomes especially noticeable during:
– family camping trips,
– group campsites,
– beach camping,
– and hot-weather summer weekends.
Why Two-Cooler Systems Work Better
Most experienced campers separate:
– drinks and high-access items,
– from long-term food storage.
The drink cooler gets opened constantly while the food cooler stays closed much longer throughout the day.
That separation dramatically improves:
– ice retention,
– food temperature consistency,
– cooler organization,
– and overall campsite efficiency.
In many cases, simply adding a second smaller drink cooler extends food-cooler ice life by an entire extra day.
The Best Way to Divide Cooler Space
The most effective setups usually look something like this:
Drink Cooler
– water bottles
– soda
– beer
– sports drinks
– quick snacks
– grab-and-go items
Food Cooler
– raw meat
– dairy products
– eggs
– meal ingredients
– longer-term perishables
– frozen food
This prevents campers from digging through food storage every time someone wants a cold drink.
Smaller Coolers Often Work Better Than One Massive Cooler
Many campers assume one giant cooler is always the best solution.
But oversized coolers can actually create problems:
– excess empty air space,
– poor organization,
– heavier ice loss after opening,
– and harder temperature management.
Two medium coolers are often easier to:
– organize,
– carry,
– separate by use,
– and keep consistently cold during multi-day trips.
For campers building more efficient campground cooking systems, our guide on Car Camping Essentials Checklist covers how experienced campers separate cooking gear, food storage, and campsite organization for smoother multi-day setups.
When One Cooler Still Makes Sense
Single-cooler systems still work well for:
– short weekend trips,
– solo campers,
– cooler weather,
– minimalist setups,
– and smaller food loads.
The key is simply reducing unnecessary opening frequency and organizing the interior properly from the beginning of the trip.
Even basic separation containers can noticeably improve ice retention inside one-cooler setups.
Best Types of Ice for Camping Coolers
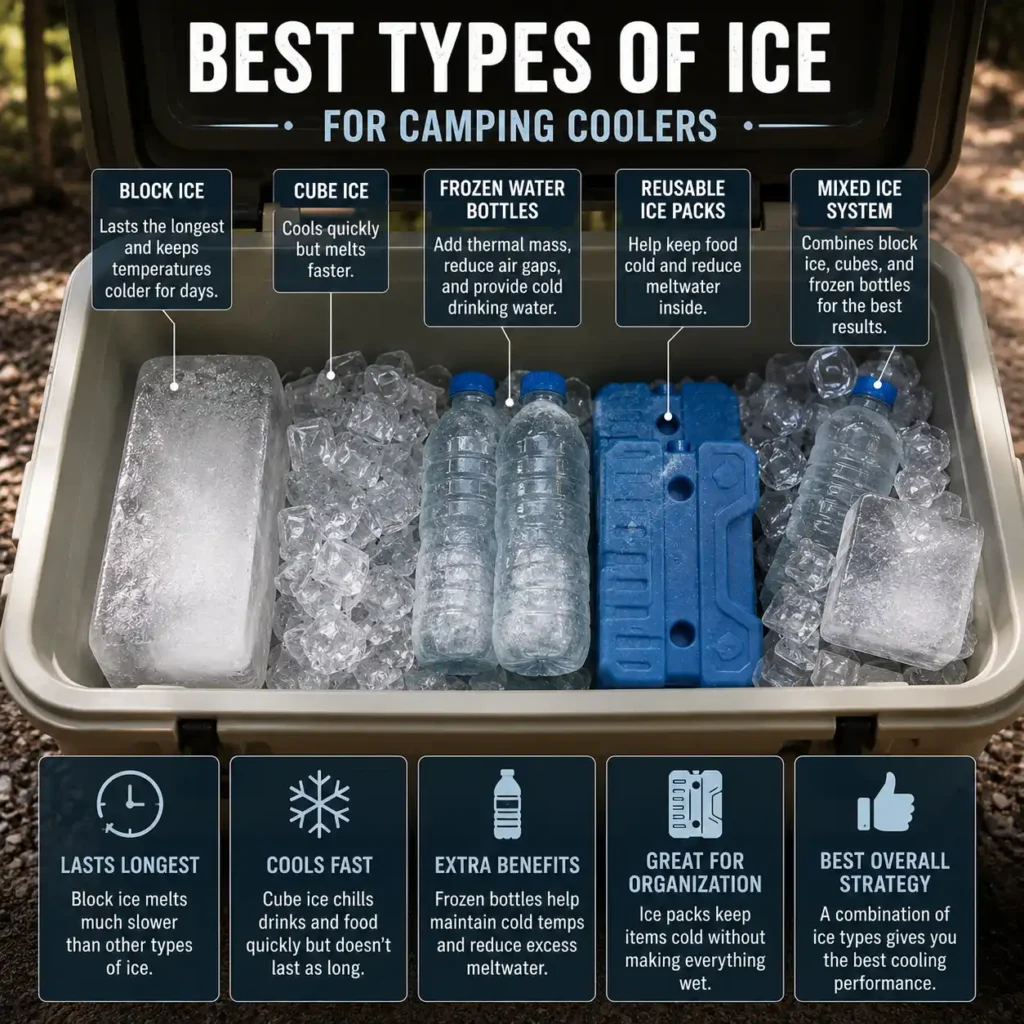
Not all ice performs the same once temperatures rise at the campsite.
Some ice melts quickly within a few hours, while other cooling methods can maintain lower temperatures for multiple days with far less water buildup inside the cooler.
The type of ice campers choose has a surprisingly large effect on:
– food temperature stability,
– cooler organization,
– meltwater management,
– and overall ice longevity during longer trips.
Block Ice Lasts the Longest
Block ice consistently outperformed standard cube ice during longer campground trips.
Because larger blocks expose less surface area, they melt much more slowly and maintain colder temperatures deeper inside the cooler.
That makes block ice ideal for:
– multi-day camping,
– hot-weather trips,
– food coolers,
– and extended cold storage.
Many experienced campers place large blocks:
– at the bottom of the cooler,
– along side walls,
– or beneath raw meat and long-term food storage.
The biggest downside is slower cooling speed for drinks and frequently accessed items.
Cube Ice Cools Faster but Melts Faster
Loose cube ice works well for:
– drinks,
– fast cooling,
– and short-term access.
But it usually melts much faster because smaller pieces expose significantly more surface area to warmer air.
Gas-station ice bags are convenient, though many begin partially melting long before campers even reach the campsite — especially during hotter road trips.
Cube ice works best when combined with:
– block ice,
– frozen bottles,
– or separate drink coolers.
Frozen Water Bottles Work Surprisingly Well
Frozen water bottles are one of the simplest camping cooler upgrades.
They:
– add additional thermal mass,
– reduce empty air pockets,
– create less meltwater,
– and provide cold drinking water later in the trip.
They also help keep food drier because they thaw much more slowly than loose cube ice.
Many campers use frozen bottles near:
– dairy products,
– sandwich ingredients,
– and foods that should avoid sitting in cold water.
Reusable Ice Packs Help With Food Separation
Hard ice packs are not always the coldest solution, but they help create cleaner cooler organization.
They work especially well for:
– lunch meat,
– cheese,
– fruit,
– snacks,
– and upper-layer food storage.
Because they stay contained, they also reduce excess water buildup inside the cooler.
However, most reusable packs do not maintain cold temperatures as long as large block ice during hotter camping conditions.
Mixed Ice Systems Usually Perform Best
After testing different cooler setups, mixed systems consistently produced the best results during multi-day camping trips.
The strongest setups usually combined:
– block ice for long-term cooling,
– cube ice for drinks,
– and frozen bottles for temperature stability.
That approach helped:
– extend ice life,
– reduce soggy food,
– improve organization,
– and maintain more consistent cooler temperatures overall.
How Cold Should Food Stay Inside a Camping Cooler?
A cooler full of ice does not automatically mean food is staying safely cold.
That is one of the biggest misconceptions many campers have during warmer trips.
Even when ice is still visible inside the cooler, food temperatures can quietly rise into unsafe ranges — especially after repeated lid openings, direct sun exposure, or poor cooler organization.
The Safe Temperature Zone for Camping Food
Perishable food should generally stay below 40°F (4°C) to remain safely refrigerated during camping trips.
Once temperatures rise above that range for extended periods, bacteria can begin multiplying much faster than many campers realize.
According to the USDA Food Safety Guidelines, perishable food should stay at or below 40°F (4°C) during outdoor trips to reduce the risk of bacterial growth and foodborne illness.
This matters most for:
– raw meat,
– dairy products,
– eggs,
– cooked leftovers,
– lunch meat,
– and seafood.
Hot-weather camping creates even more risk because cooler temperatures fluctuate constantly throughout the day.
Ice Alone Is Not Always a Reliable Indicator
Many campers assume:
“If there’s still ice inside, everything is fine.”
Unfortunately, that is not always true.
Certain foods sitting near:
– the cooler lid,
– exposed air pockets,
– warm drinks,
– or frequently accessed sections
can warm much faster than deeper cooler areas.
This becomes especially common in overloaded coolers with poor internal organization.
Cooler Thermometers Are Surprisingly Helpful
Small waterproof cooler thermometers are one of the easiest upgrades for longer camping trips.
They help campers:
– monitor temperature changes,
– spot warming trends early,
– and reduce unnecessary food waste.
This becomes extremely useful during:
– summer camping,
– multi-day trips,
– road-based camping,
– and family campground setups where coolers get opened constantly.
Drainage Habits Matter More Than Most Campers Think
One of the most debated cooler questions is whether meltwater should stay inside the cooler.
In many cases, keeping extremely cold water inside actually helps maintain lower temperatures longer because water retains cold efficiently.
However, once excessive water buildup begins:
– floating food,
– soaking packaging,
– contamination risks,
– and temperature inconsistencies
become much more likely.
The best approach is usually controlled drainage rather than constantly emptying the cooler every few hours.
High-Risk Foods Need Extra Attention
Certain foods become unsafe faster than others during camping trips.
Extra caution is important with:
– raw chicken,
– seafood,
– soft dairy,
– uncooked burgers,
– and prepared meals containing mayonnaise or cream-based ingredients.
Keeping those foods:
– deeply insulated,
– tightly sealed,
– and stored near long-lasting ice sources
usually provides the safest long-term cooling performance.
For campers preparing more advanced outdoor meals, our guide on 5 Best Camping Cookware for One-Pot Meals covers simpler campground cooking setups that reduce cooler clutter and food-storage complications during longer trips.
Common Cooler Mistakes That Ruin Ice Retention
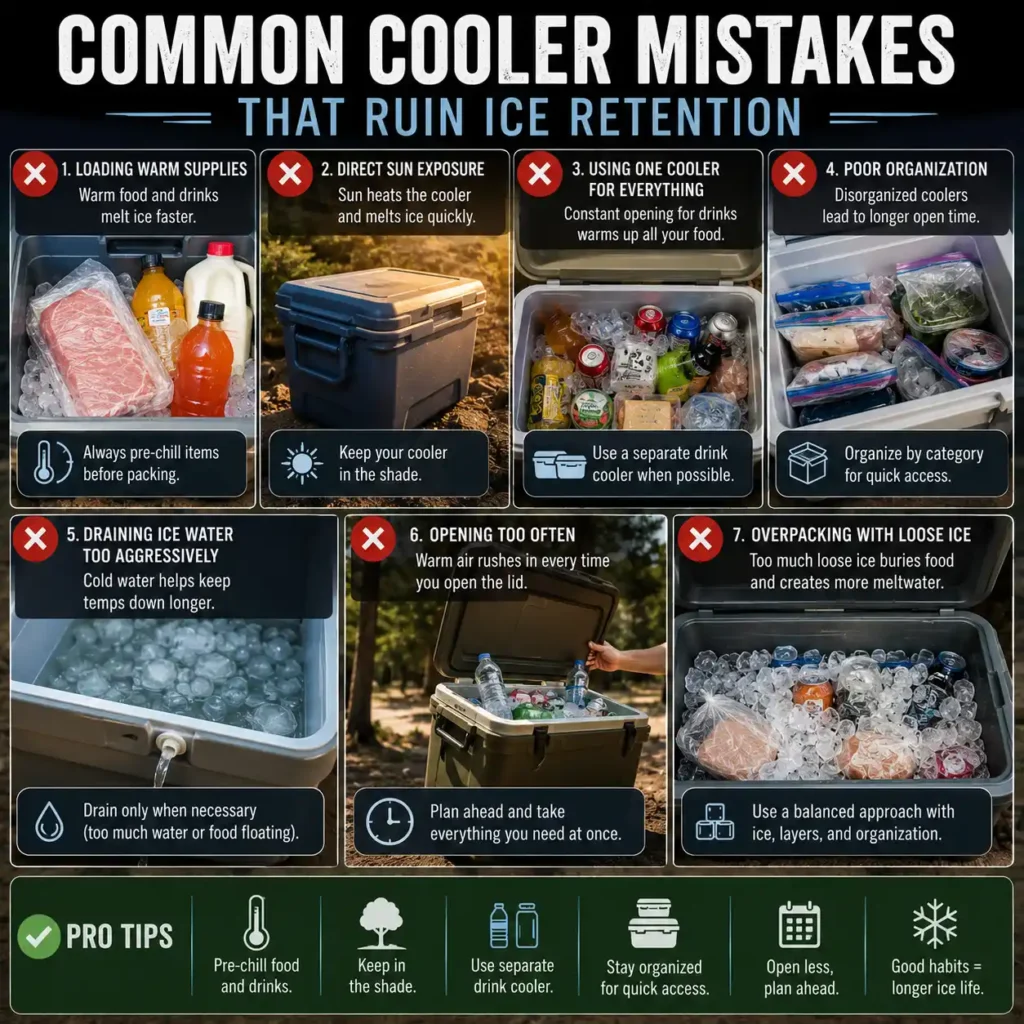
Most cooler problems are completely avoidable.
And interestingly, the biggest ice-retention failures usually have very little to do with buying the “wrong” cooler.
They come from small habits that slowly destroy cold retention throughout the trip.
Loading Warm Supplies Into the Cooler
Throwing room-temperature drinks and groceries directly into the cooler is one of the fastest ways to melt ice.
The cooler immediately starts using its cold energy to lower those temperatures first, which burns through ice surprisingly quickly during the first several hours outdoors.
Even partially chilling:
– drinks,
– meat,
– dairy,
– and prepared meals
before departure can dramatically improve overall ice longevity.
Leaving the Cooler in Direct Sunlight
This mistake quietly destroys cooler performance all day long.
Even premium coolers absorb significant external heat when left:
– beside picnic tables,
– near campfires,
– inside hot vehicles,
– or exposed to full afternoon sun.
Many campers underestimate how aggressively sunlight heats cooler walls during summer camping trips.
Simple shade placement often extends ice life more effectively than adding another bag of ice later.
Using One Cooler for Everything
When food, drinks, snacks, condiments, and cooking ingredients all share one cooler, cold retention usually drops fast.
Drink access alone creates constant temperature swings throughout the day.
Separating:
– beverages,
– quick-access items,
– and long-term food storage
is one of the easiest ways to improve cooler efficiency during multi-day camping.
Poor Food Organization
Disorganized coolers create longer lid-open time.
And longer lid-open time means:
– faster temperature loss,
– warmer internal air,
– and accelerated ice melt.
Coolers packed with loose grocery bags and random food layers usually perform far worse than organized systems with grouped ingredients and dedicated storage containers.
Draining Ice Water Too Aggressively
Many campers constantly drain cold water every few hours assuming it automatically improves cooler performance.
In reality, extremely cold meltwater often helps maintain lower internal temperatures longer.
Excessive drainage can sometimes remove valuable cold mass faster than necessary — especially during hotter weather.
The better approach is controlled drainage once:
– food starts floating,
– packaging becomes soaked,
– or organization becomes difficult.
Opening the Cooler Too Often
Repeated opening is still one of the biggest reasons ice disappears quickly during camping trips.
Even small habits add up:
– checking food repeatedly,
– grabbing drinks constantly,
– browsing for snacks,
– or leaving the lid open during cooking.
The most efficient campers usually know exactly where items are stored before opening the cooler at all.
That small habit alone can noticeably improve ice retention by the second or third day of the trip.
Overpacking the Cooler With Loose Ice
More ice is not always better if the cooler becomes impossible to organize.
Excess loose cube ice often creates:
– buried food,
– longer searching,
– trapped water,
– and inefficient airflow.
Balanced layering generally performs much better than simply overfilling the cooler with random ice bags.
Best Cooler Packing Strategy for Multi-Day Camping
A cooler can have premium insulation, expensive rotomolded walls, and plenty of ice — yet still perform poorly if it’s packed without any structure.
The way food is layered inside the cooler affects:
– ice longevity,
– temperature consistency,
– food safety,
– and how often the cooler gets opened throughout the day.
Experienced campers usually pack coolers strategically long before leaving for the campsite.
Start With the Coldest Items at the Bottom
The bottom section of the cooler stays coldest the longest.
That makes it the best location for:
– block ice,
– frozen meat,
– frozen meals,
– and long-term perishables.
Many campers also freeze certain meals ahead of time so they act as additional cold sources during the first part of the trip.
Keeping the coldest items deep inside the cooler helps stabilize temperatures much more effectively during hotter afternoons.
Build Layers Instead of Random Piles
One of the biggest cooler mistakes is dumping everything inside randomly.
That creates:
– poor airflow,
– difficult access,
– longer lid-open time,
– and uneven cooling zones.
The most efficient setups usually use layers:
– long-term frozen food at the bottom,
– dairy and meal ingredients in the middle,
– frequently used food near the top.
This makes campground cooking dramatically faster while helping cold air remain trapped deeper inside the cooler.
Keep Frequently Used Food Easy to Reach
Every extra second spent searching through the cooler releases more cold air.
The best setups place:
– drinks,
– sandwich ingredients,
– breakfast food,
– snacks,
– and condiments
near the top or near one side for faster access.
Many experienced campers even group food by meal:
– breakfast section,
– lunch section,
– dinner section.
That organization reduces repeated digging throughout the trip.
Fill Empty Space Whenever Possible
Large empty air pockets warm up quickly every time the lid opens.
That is why tightly packed coolers generally retain cold temperatures much longer than half-empty setups.
Frozen water bottles work especially well because they:
– reduce air gaps,
– add additional thermal mass,
– and create less loose meltwater.
Even towels or sealed food containers can help stabilize internal temperature zones by reducing excess airflow.
Keep Water-Sensitive Food Elevated
Once ice starts melting, cooler water can quickly soak:
– vegetables,
– cheese,
– sandwich ingredients,
– tortillas,
– and packaged food.
Small storage racks or sealed containers help keep sensitive food above standing water while still remaining cold.
This also improves organization and makes food easier to access during meal prep.
Pre-Pack the Cooler Before Departure
Packing the cooler at the campsite itself usually introduces unnecessary heat immediately.
The best approach is fully organizing:
– food,
– ice,
– containers,
– and layering
before leaving home whenever possible.
A properly pre-packed cooler starts the trip colder, stays organized longer, and usually holds ice noticeably better during the first several days outdoors.
Best Cooler Setup for Weekend vs Multi-Day Camping
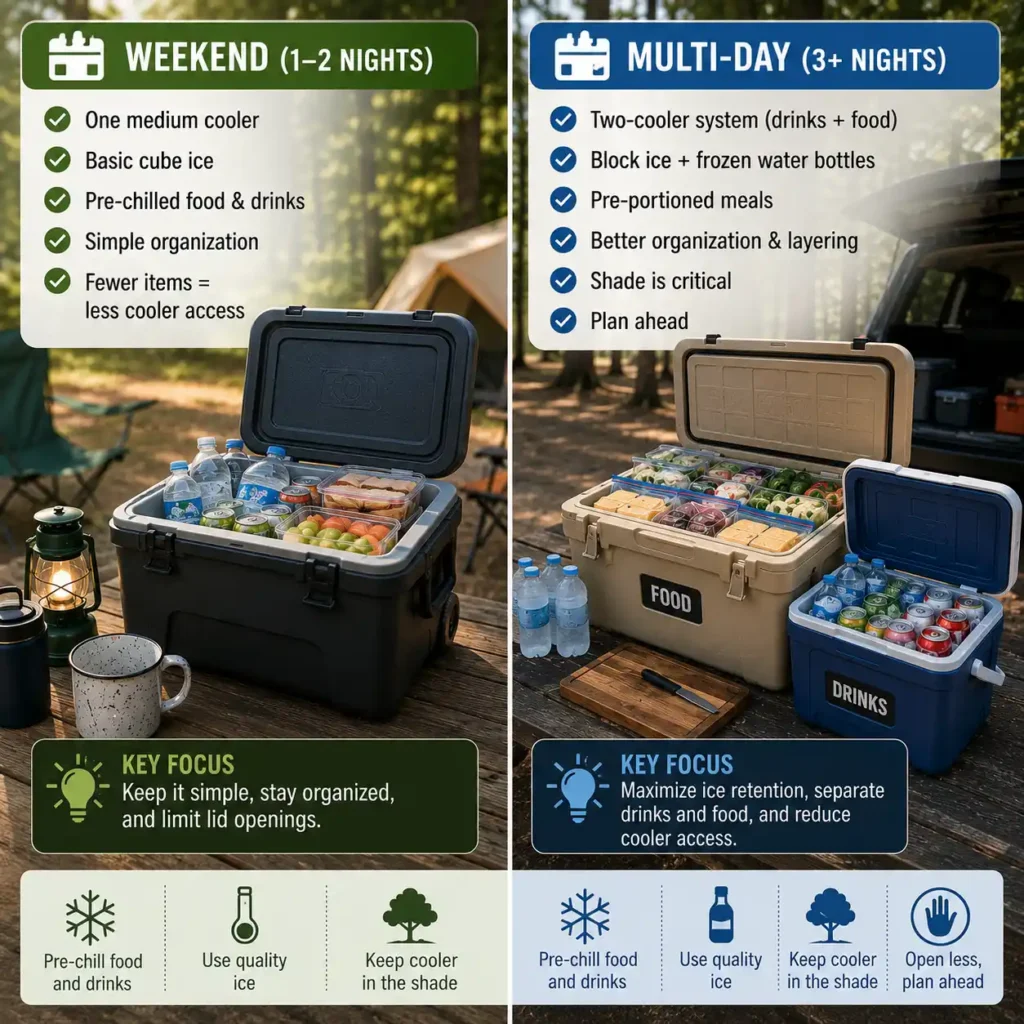
Not every camping trip needs the same cooler strategy.
A simple overnight campground stay has very different food-storage demands compared to:
– long summer weekends,
– multi-family campsites,
– road-based camping trips,
– or extended outdoor travel.
One of the biggest mistakes campers make is overcomplicating short trips while underpreparing for longer ones.
Best Cooler Setup for Weekend Camping
For shorter 1–2 night trips, simpler setups usually work perfectly well.
Most campers can comfortably manage with:
– one medium cooler,
– basic cube ice,
– pre-chilled food,
– and minimal organization systems.
The key is avoiding unnecessary complexity.
A properly packed cooler with:
– grouped meals,
– chilled drinks,
– and limited opening frequency
can easily maintain safe food temperatures through an average weekend trip.
This is especially true during:
– cooler weather,
– shaded campsites,
– and smaller solo or couple camping setups.
Best Cooler Setup for 3–5 Day Camping Trips
Longer trips require a much more controlled system.
Once camping extends past a couple days, ice retention becomes heavily dependent on:
– organization,
– cooler separation,
– shade management,
– and smarter food planning.
The most effective multi-day setups usually include:
– separate drink and food coolers,
– block ice,
– frozen water bottles,
– pre-portioned meals,
– and tightly layered food organization.
At that point, reducing cooler access becomes just as important as the cooler itself.
Hot-Weather Camping Needs More Ice Strategy
Summer campground trips create completely different cooling challenges.
Even strong coolers lose temperature faster when exposed to:
– direct sunlight,
– repeated lid openings,
– hot vehicles,
– and warmer overnight conditions.
During hotter trips, experienced campers usually:
– freeze more food beforehand,
– increase block ice usage,
– separate drinks entirely,
– and prioritize permanent shade throughout the day.
Family Camping Requires Better Organization
Larger groups dramatically increase cooler traffic.
Kids grabbing drinks constantly, repeated snack access, and frequent meal prep all accelerate ice loss surprisingly fast.
Family setups generally benefit most from:
– two-cooler systems,
– dedicated snack storage,
– organized meal grouping,
– and easy-access drink stations.
Without structure, cooler temperatures fluctuate constantly throughout the day.
Minimalist Campers Can Often Use Smaller Coolers
Not every camper needs oversized coolers filled with complicated food systems.
Minimalist setups built around:
– simple meals,
– dry food,
– one-pot cooking,
– and lightweight organization
often require far less cooling capacity overall.
In many cases, simplifying the menu itself improves cooler performance more than upgrading equipment.
Frequently Asked Questions About Keeping Food Cold While Camping
How long should ice last in a camping cooler?
A well-packed cooler can often keep ice for:
– 2–3 days with regular coolers,
– and 4–7 days with premium rotomolded coolers
depending on:
– outside temperature,
– cooler organization,
– sun exposure,
– and how often the lid gets opened.
In many cases, cooler management habits matter more than the cooler brand itself.
Is block ice better than cube ice for camping?
Yes — block ice usually lasts significantly longer because it melts more slowly and maintains colder internal temperatures deeper inside the cooler.
Many experienced campers combine:
– block ice for long-term cooling,
– and cube ice for drinks or quick-access food.
That mixed setup often performs best during multi-day camping trips.
Should you drain water from a camping cooler?
Not immediately.
Very cold meltwater can actually help maintain lower cooler temperatures longer.
However, once:
– food starts floating,
– packaging becomes soaked,
– or organization becomes difficult,
controlled drainage usually becomes the better option.
How do you keep meat cold while camping?
Raw meat should stay:
– sealed tightly,
– near the bottom of the cooler,
– close to block ice or frozen bottles,
– and separated from drinks and frequently accessed food.
Freezing meat before departure also helps extend cold retention significantly during the first couple days outdoors.
Is one cooler enough for camping?
For short trips, yes.
But during:
– hot weather,
– longer trips,
– family camping,
– or larger campsites,
two-cooler systems usually work much better by separating drinks from long-term food storage.
That dramatically reduces repeated food-cooler opening throughout the day.
What foods stay cold longest while camping?
Foods that generally hold colder temperatures longest include:
– frozen meat,
– hard cheese,
– sealed drinks,
– dense prepared meals,
– and frozen water bottles.
Items that warm faster usually include:
– dairy,
– seafood,
– lunch meat,
– leafy vegetables,
– and loosely packaged food.
How cold should a camping cooler stay?
Perishable food should generally stay below **40°F (4°C)** for safe refrigeration during camping trips.
Small waterproof cooler thermometers make monitoring temperatures much easier during hot-weather camping.
Are expensive camping coolers really worth it?
For longer multi-day camping trips, premium coolers can absolutely improve:
– ice retention,
– insulation consistency,
– and temperature stability.
But even expensive coolers perform poorly when:
– packed badly,
– exposed to direct sunlight,
– or opened constantly throughout the day.
Good cooler habits still matter more than most campers realize.
What is the best way to organize food inside a cooler?
The most efficient cooler setups usually:
– keep frozen food and meat near the bottom,
– place frequently used items near the top,
– separate drinks entirely,
– and reduce loose packaging whenever possible.
Better organization reduces lid-open time, improves food safety, and helps ice last noticeably longer during multi-day trips.
Final Verdict
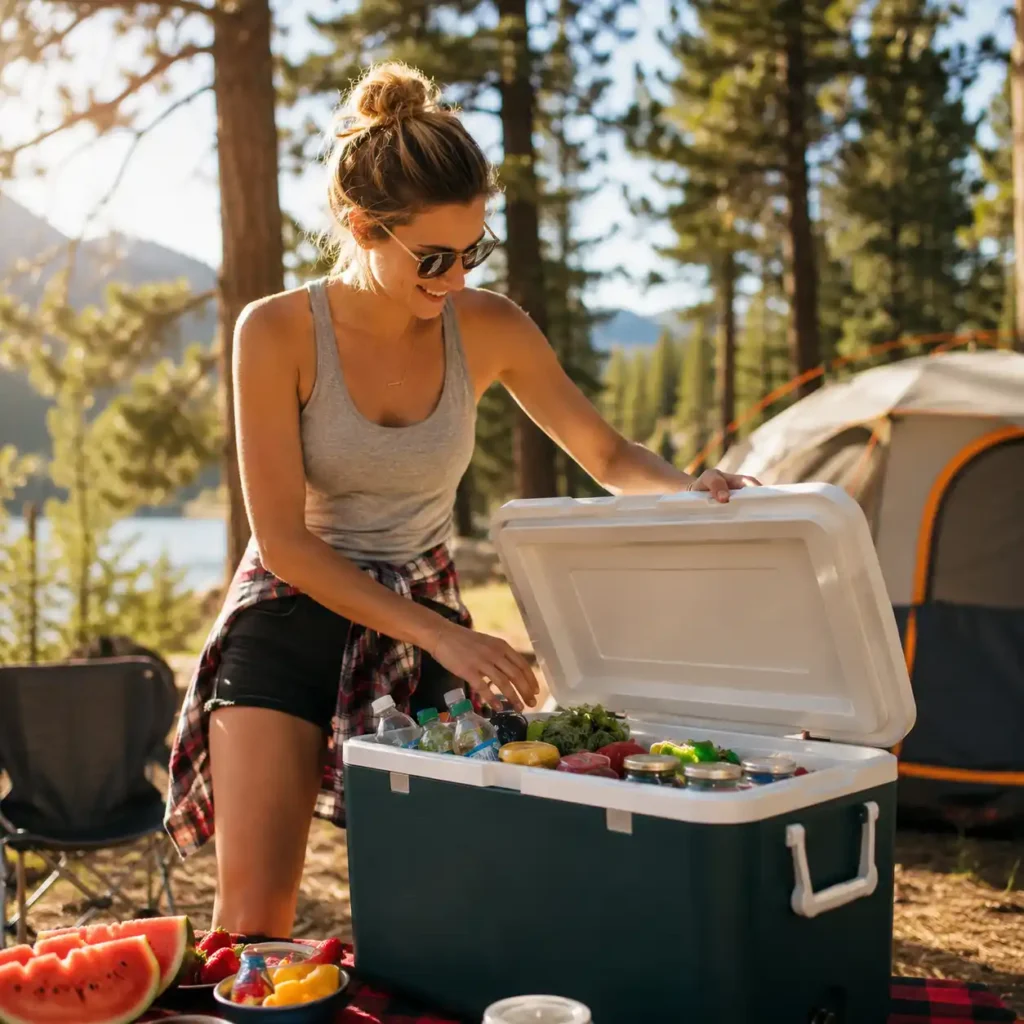
Keeping food cold while camping has a lot less to do with buying the most expensive cooler and far more to do with building a smarter cooling system from the beginning of the trip.
After years of campground cooking, summer camping, road-based trips, and multi-day outdoor setups, one thing consistently makes the biggest difference:
The campers who keep food cold the longest are usually the ones managing their coolers more intentionally.
That means:
– pre-chilling food properly,
– using better ice combinations,
– reducing unnecessary cooler access,
– organizing food in layers,
– and keeping coolers protected from heat throughout the day.
Even relatively average coolers can perform surprisingly well once those habits improve.
Meanwhile, poorly organized coolers often struggle regardless of how expensive they are.
For most campers, the biggest upgrades usually come from:
– smarter packing,
– better food separation,
– improved campsite organization,
– and reducing repeated temperature swings during the day.
Because once a cooler stays consistently cold, the entire camping trip becomes easier:
– less food waste,
– fewer campground ice runs,
– simpler meal prep,
– cleaner organization,
– and far less frustration once temperatures start rising outdoors.
About the Author
Anthony is the lead editor of CampComfortGuide.com and focuses heavily on practical campground comfort, cooler management, campsite organization, and real-world outdoor systems built around actual camping experience rather than controlled product testing alone.
Over the years, he has tested camping food-storage setups across:
– hot-weather campground trips,
– multi-day car camping weekends,
– mountain campsites,
– road-based camping travel,
– family campground setups,
– and longer outdoor trips where cooler organization and food management become much more important than most campers initially expect.
His guides focus heavily on the smaller real-world problems that often affect campsite comfort the most:
– fast-melting ice,
– disorganized coolers,
– food spoilage,
– repeated campground ice runs,
– poor campsite layout,
– and inefficient cooking setups during longer trips outdoors.
The goal is simple:
Help campers build cooler systems and campsite setups that stay cleaner, colder, easier to manage, and far less frustrating once real camping conditions begin.