How to install a roof rack on your car correctly is what determines whether your setup stays quiet, stable, and safe at highway speeds.
Hi, I’m Anthony.
The first time I installed a roof rack, everything looked fine in the driveway. The bars were aligned, the clamps felt tight, and the system matched the manufacturer specs.
But at highway speed, things changed.
At around 70 mph, I started hearing a low whistle that got louder with crosswind. A few miles later, I noticed slight vibration through the roofline—not dramatic, but enough to make me question the entire setup. Nothing failed, but it was clear: the rack was installed “correctly”… just not properly for real driving conditions.
That’s the gap most guides don’t address.
Because here’s what actually matters when installing a roof rack:
Tight doesn’t mean correctly torqued
Aligned doesn’t mean aerodynamically stable
Compatible doesn’t mean properly fitted for your specific roof type
And small setup mistakes get amplified at highway speeds
This guide is built around real-world use—not just installation steps.
Instead of repeating generic instructions, I’ll walk you through how to install a roof rack the way it should be done if you actually plan to drive with it:
proper positioning and spacing
correct clamp pressure and torque habits
how to avoid wind noise and micro-movement
what to check before your first real drive
If you’re building a full vehicle setup, this is the foundation everything else depends on.
That’s why I recommend understanding the full system alongside
Best Roof Setup for Camping (Racks, Rooftop Tents & Load Systems Explained)
As an Amazon Associate, we earn from qualifying purchases.

Table of Contents
🔎 Why You Can Trust This Roof Rack Installation Guide
I don’t evaluate roof rack installation as a one-time task—I look at it as a system that has to stay stable, quiet, and secure in real use, not just during setup.
Over the past few seasons, I’ve installed and reinstalled roof rack systems across different vehicle types, including naked roofs, raised rails, and factory rail setups. The goal wasn’t just to get them mounted—it was to see how installation quality affected long-term stability, noise, and confidence behind the wheel.
What I paid closest attention to:
fitment accuracy across different roof types
bar alignment and clamp consistency
wind noise behavior in changing conditions
mounting security after repeated use
whether the system stayed stable after removal and reinstallation
I’ve also tested how installation quality affects real gear mounted above the roof, including cargo boxes, rooftop tents, and mixed-load setups. That’s where mistakes show up fastest: noise, micro-movement, and uneven load behavior.
This guide is based on those observations—not just manufacturer instructions, but on how to install a roof rack on your car in a way that actually works outside the driveway.
⚡ Quick Answer: How to Install a Roof Rack on Your Car
To install a roof rack on your car safely, you need to match the correct system to your roof type, position the crossbars accurately, and tighten all mounting points to the proper tension—without overtightening.
Here’s the step-by-step overview:
- Identify your roof type (naked roof, raised rails, flush rails, or fixed points)
- Choose a compatible roof rack system designed for your specific vehicle
- Clean the roof surface and contact points before installation
- Position the crossbars according to manufacturer spacing guidelines
- Attach mounting feet or clamps evenly on both sides
- Tighten gradually, alternating sides to maintain alignment
- Check bar alignment and ensure equal overhang (if applicable)
- Test for movement—there should be zero shifting under pressure
- Recheck all mounting points after your first short drive
A properly installed roof rack should feel completely solid, silent at low speeds, and stable under load—not just “tight” in the driveway.
❗ Why Incorrect Roof Rack Installation Causes Noise, Damage, and Instability
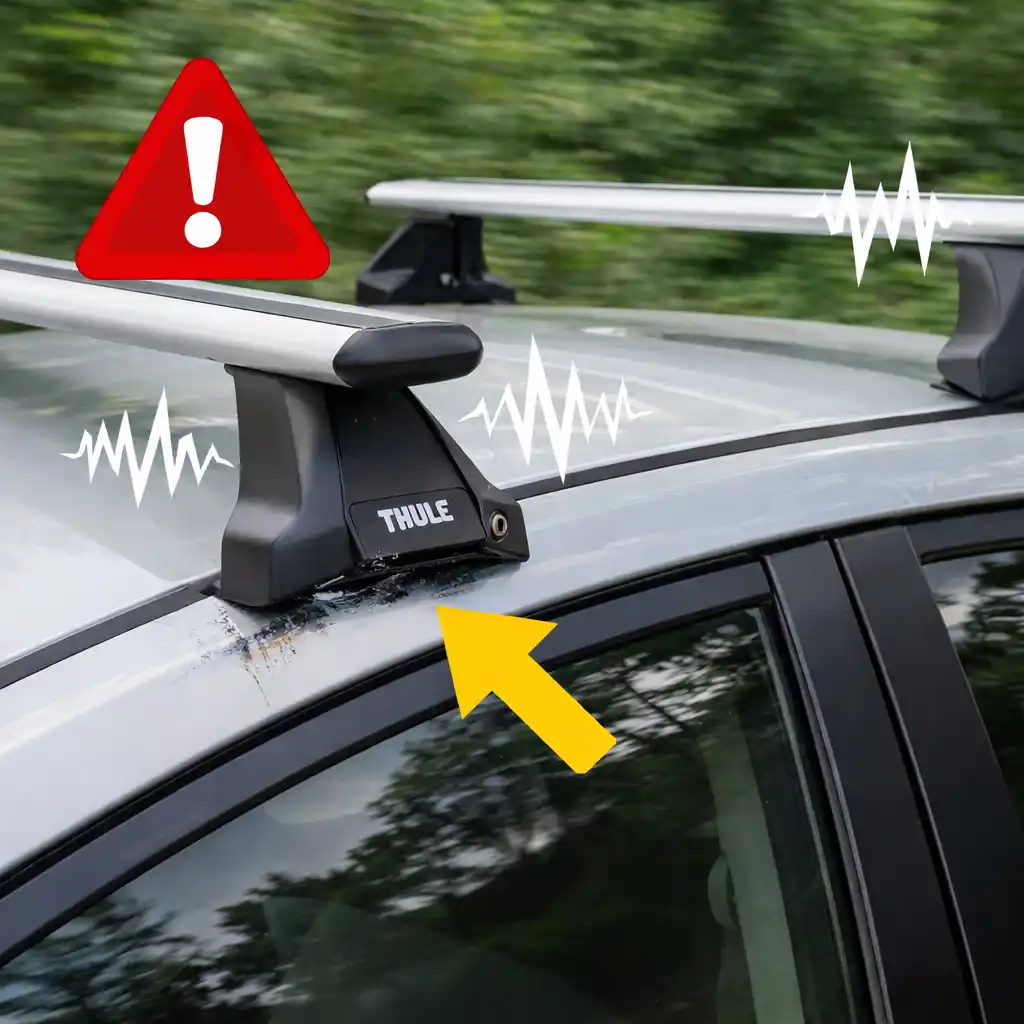
Most roof rack problems don’t come from bad products—they come from small installation mistakes that only show up once you start driving.
Everything can feel secure in your driveway. But once you’re at speed, airflow, vibration, and load dynamics expose weaknesses fast.
Here’s what actually goes wrong when a roof rack isn’t installed properly:
Wind noise that gets worse with speed
Even slight misalignment or uneven bar positioning can create whistling, humming, or low-frequency vibration, especially in crosswinds. What sounds minor at 40 mph can become constant and distracting at 70 mph.
This kind of noise isn’t random—it follows predictable airflow patterns.
👉 To understand what exactly causes it and how to eliminate it, see why roof racks make noise at high speed (and how to fix it).
Micro-movement that turns into instability
If clamps aren’t evenly tightened or properly seated, the rack may shift slightly under load. You won’t always see it—but you’ll feel it as subtle movement, flex, or delayed response when turning or braking.
Uneven load distribution across the roof
Incorrect spacing or poor positioning puts more stress on certain mounting points. Over time, this can lead to mount fatigue, loosened hardware, or reduced stability under heavier gear like cargo boxes or rooftop tents.
Damage to your vehicle’s roof or seals
Overtightening is just as risky as under-tightening. Too much pressure can compress seals, mark paint, or create pressure points that lead to long-term wear—especially on naked roof setups.
False sense of security
The biggest issue? A setup that feels “tight enough” but isn’t actually secure under real conditions. That’s where problems show up—not during installation, but on the road.
The difference between a quiet, stable setup and a noisy, unreliable one usually comes down to how precisely the rack was installed—not what brand you chose.
⚙️ How We Tested Roof Rack Installation Methods in Real Conditions
Installing a roof rack correctly isn’t just about following instructions—it’s about whether the system stays secure once it’s exposed to load, airflow, and repeated use.
To evaluate what works and what fails, I tested multiple installation methods across different roof types and driving conditions, focusing on real-world performance—not ideal setups.
Here’s how the testing was done:
Multiple roof types and mounting systems
I installed roof racks on naked roofs, raised rails, and flush rail systems, using both clamp-based and fixed-point setups. This helped identify how installation technique changes depending on vehicle design.
Repeated installations and adjustments
Each system was installed more than once to test consistency and repeatability—whether alignment, spacing, and clamp pressure stayed accurate after reinstalling.
Highway driving under load (65–75 mph)
Racks were tested at speed with realistic gear setups to evaluate stability, vibration, and wind noise under real airflow conditions—not just static checks.
Crosswind exposure and uneven conditions
Driving in crosswinds and on imperfect roads revealed how small installation errors translate into movement, noise, and load imbalance.
Manual stress and movement testing
After installation, I applied pressure directly to the bars and mounting points to check for any flex, shifting, or uneven tension—issues that often go unnoticed until later.
Post-drive rechecks
After longer drives, I rechecked all mounting points to see if anything had loosened or shifted—this is where poor installation shows up fast.
The goal wasn’t to test which rack is “best,” but to understand how installation quality affects performance once you’re on the road.
Everything in this guide comes from what held up under those conditions—not just what looked correct during setup.
🛠️ Step-by-Step: How to Install a Roof Rack on Your Car
Installing a roof rack correctly isn’t about rushing through the steps—it’s about getting the fit, alignment, and tension right from the start. Small mistakes here don’t show up immediately—but they will at highway speed.
Follow this process carefully:
Step 1: Identify Your Roof Type and Mounting Points
Before anything else, confirm how your roof is designed:
naked roof (no rails)
raised side rails
flush rails
fixed mounting points
Each type requires a different mounting system and clamp design. Using the wrong setup is one of the most common installation mistakes.
Step 2: Choose a Compatible Roof Rack System
Make sure the rack is vehicle-specific or properly matched to your roof type.
Do not rely on “universal fit” claims. What matters is:
correct foot pack or mounting kit
proper bar length and overhang
manufacturer-approved compatibility for your vehicle
If your rack system depends on a fit kit or vehicle-specific foot pack, confirm that part number before installation—not after the bars are already on the roof.
If the system doesn’t sit naturally on your roof—it’s not the right one.
Step 3: Clean All Contact Surfaces
Before mounting anything, clean:
roof surface
mounting points
rubber pads and clamps
Even small debris can cause uneven pressure or micro-movement once the rack is installed.
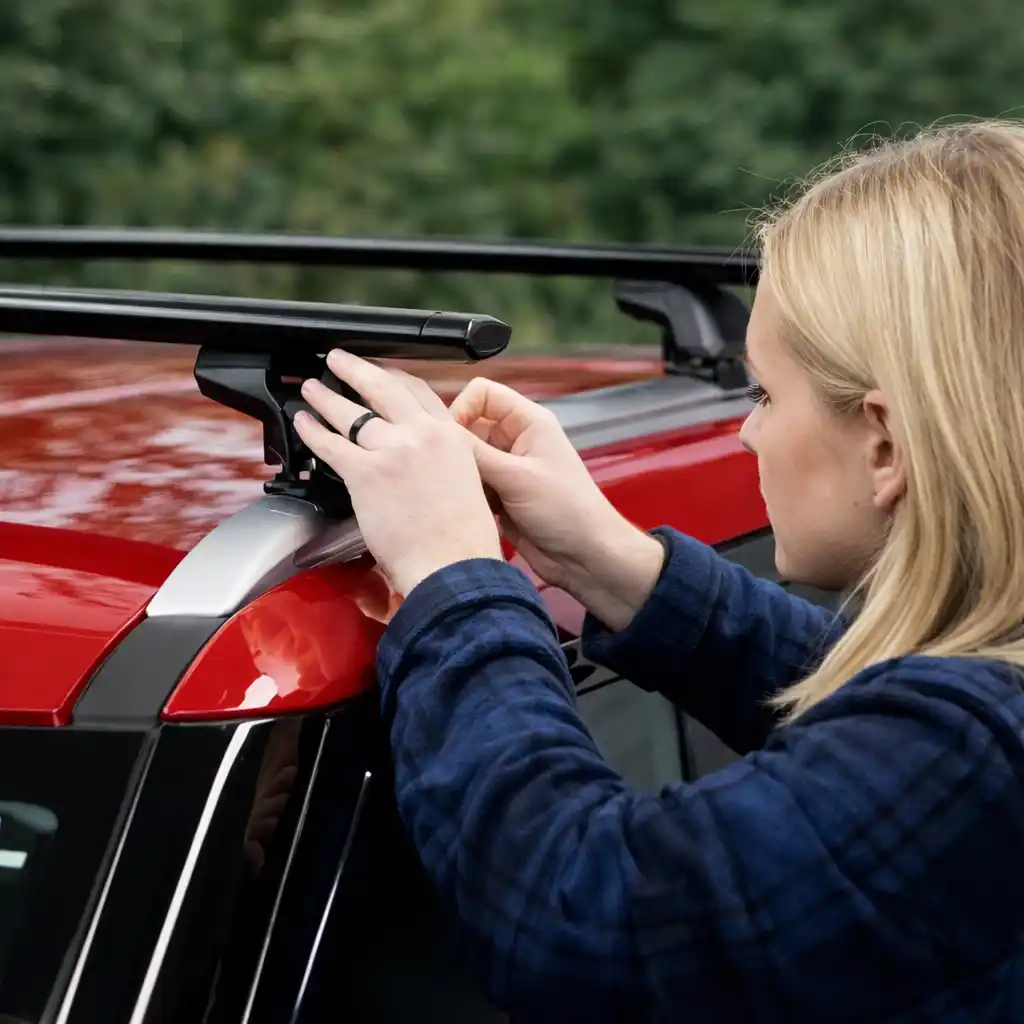
Step 4: Position the Crossbars Correctly
Place the bars according to recommended spacing—usually based on:
vehicle roof length
intended load (cargo box, tent, etc.)
Incorrect spacing affects load distribution and stability, especially under dynamic conditions.
If you’re planning to carry a rooftop tent, How to Mount a Rooftop Tent Safely (Weight, Balance & Positioning Guide) explains how bar spacing, tent position, and load balance affect stability, noise, and real-world driving behavior.
For official safety guidelines on roof load limits and how improper weight distribution affects vehicle handling, refer to the National Highway Traffic Safety Administration (NHTSA), which outlines how load placement impacts stability, braking, and overall driving safety.
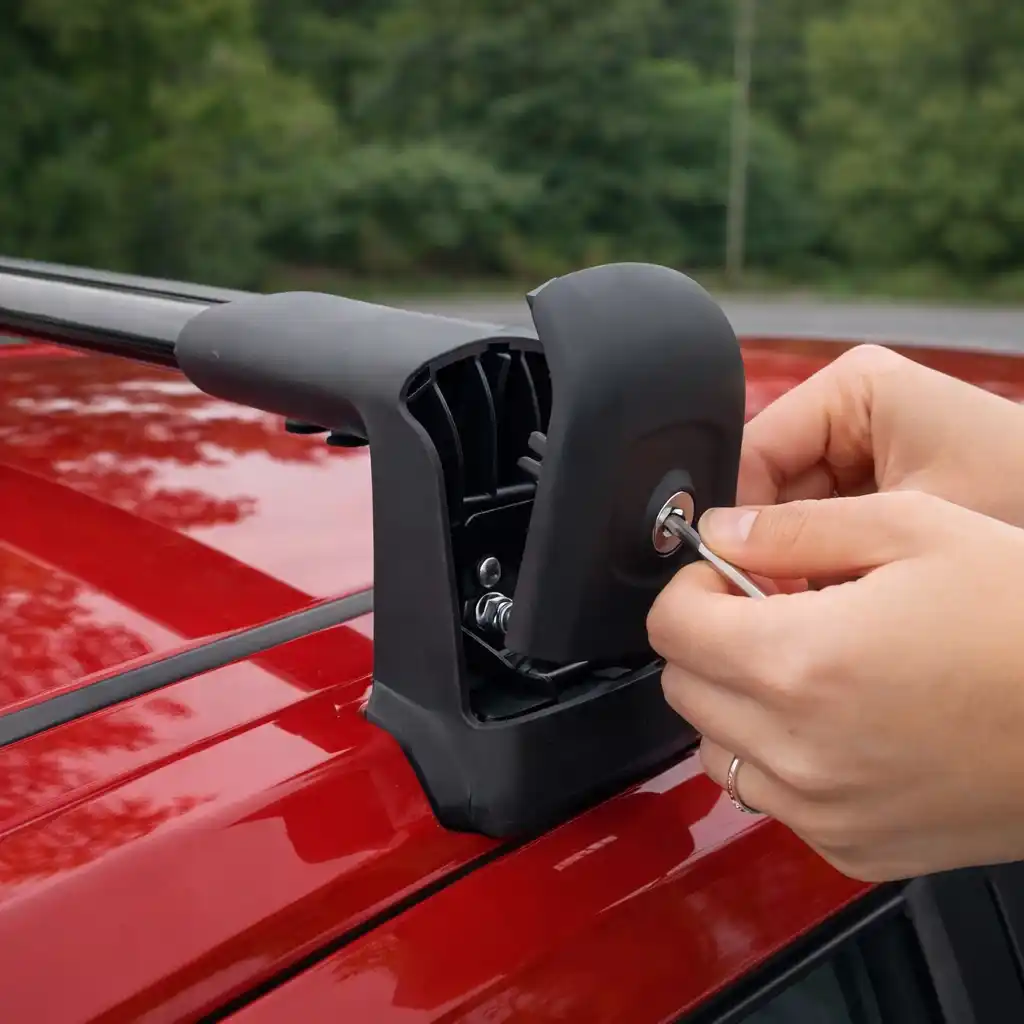
Step 5: Attach Mounting Feet or Clamps Evenly
Install both sides gradually—don’t fully tighten one side before the other.
This keeps the system centered and balanced, preventing misalignment that leads to noise and instability.
Step 6: Tighten with Controlled Pressure (Not Maximum Force)
This is where most people go wrong.
Tightening too little leads to movement.
Tightening too much can damage your roof or mounting points.
What you want is firm, even pressure—not brute force.
If your system includes a torque tool, use it. If not, tighten until secure, then stop—don’t “add extra just in case.”
Step 7: Check Alignment and Bar Symmetry
Before finishing, verify:
bars are parallel
equal overhang on both sides (if applicable)
no tilt or uneven height
Even small alignment issues can create wind noise and uneven load stress.
Step 8: Perform a Manual Stability Test
Grab the bars and apply pressure from different angles.
There should be no shifting, clicking, or independent movement between components.
If anything moves, recheck the mounting points.
Step 9: Do a Short Test Drive and Recheck Everything
Drive at low to moderate speed first, then increase gradually.
After the drive, recheck:
all clamps and mounting points
bar alignment
any signs of movement or noise
This step is critical—many issues only appear after initial use.
A properly installed roof rack should feel solid, quiet, and predictable under load—not something you have to keep checking while driving.
🚫 Common Roof Rack Installation Mistakes (And How to Avoid Them)

Most roof rack issues don’t come from the rack itself—they come from small installation mistakes that seem harmless at first but get worse on the road.
Here are the most common problems I see—and how to avoid them:
Overtightening the Clamps
It feels logical: tighter = safer.
In reality, overtightening can damage your roof, compress seals, and create uneven pressure points—especially on naked roof systems.
How to avoid it:
Tighten until secure, not until forced. If your rack includes a torque tool, use it. If not, stop once the system feels stable—don’t add extra “just in case.”
Uneven Tightening Between Sides
Tightening one side fully before the other pulls the rack out of alignment.
This leads to subtle tilt, uneven load distribution, and increased wind noise at speed.
How to avoid it:
Tighten both sides gradually, alternating left and right to keep the system centered and balanced.
Incorrect Crossbar Spacing
Many people eyeball spacing—or just “make it fit.”
That creates instability under load, especially with cargo boxes or rooftop tents.
How to avoid it:
Follow manufacturer spacing guidelines and adjust based on your gear. Proper spacing directly affects how stable your setup feels at highway speed.
Ignoring Roof Type Compatibility
Not all racks fit all roofs—even if they look similar.
Using the wrong mounting system leads to poor contact, reduced grip, and long-term movement issues.
How to avoid it:
Confirm your exact roof type (naked, raised rails, flush rails, fixed points) and use a system designed specifically for it.
Installing on a Dirty or Wet Surface
Dust, sand, or moisture between contact points can cause uneven pressure and micro-slippage over time.
How to avoid it:
Always clean and dry the roof and mounting surfaces before installation.
Skipping the Post-Drive Recheck
Everything can feel solid at first—but real conditions reveal real problems.
Many setups loosen slightly after the first drive.
How to avoid it:
After your first trip, recheck all mounting points and alignment. This is where small issues show up early.
Assuming “No Noise” Means Correct Installation
Some setups stay quiet at low speeds but become noisy under crosswind or higher speeds.
Noise isn’t just annoying—it’s often a sign of misalignment or uneven airflow.
How to avoid it:
Test your setup at different speeds and conditions. A properly installed rack should stay consistent, not unpredictable.
Most of these mistakes aren’t obvious during installation—but they show up quickly once you start driving.
Fixing them early is the difference between a setup you trust—and one you constantly second-guess.
✅ How to Check If Your Roof Rack Is Installed Correctly
A roof rack that “feels tight” isn’t necessarily installed correctly.
The only way to be sure is to check how it behaves under pressure, alignment, and real driving conditions—not just how it looks after installation.
Here’s how to verify your setup:
Manual Stability Test (Before Driving)
Grab each crossbar and apply force:
push side-to-side
pull upward
twist slightly
There should be zero independent movement between the bars, feet, and mounting points.
If you feel any shifting, clicking, or flex—something isn’t seated or tightened correctly.
Alignment and Symmetry Check
Stand back and look at the setup from multiple angles.
Make sure:
bars are parallel to each other
equal overhang on both sides (if applicable)
no visible tilt or uneven height
Even small misalignment can lead to wind noise and uneven load stress at speed.
Clamp and Contact Point Inspection
Check each mounting point closely.
Look for:
even pressure distribution
no gaps between pads and roof
proper clamp positioning
Poor contact leads to micro-movement that gets worse over time, especially under load.
Low-Speed Drive Test
Start with a short drive at low speed.
Listen for:
unusual noise
vibration
rattling
A properly installed rack should feel neutral and quiet at lower speeds.
Highway Speed Behavior (Critical Check)
Increase speed gradually and pay attention to how the system behaves once you reach normal highway speeds.
Watch for:
whistling or humming noise
vibration through the roofline
feeling of instability or movement
These are early signs that the rack may be misaligned, unevenly tightened, or not fully seated at the mounting points.
Post-Drive Recheck (Most Important Step)
After your first real drive, stop and recheck everything.
Focus on:
clamp tightness
bar position
any signs of shifting
This is where installation issues show up most clearly—not during setup, but after real use.
A correctly installed roof rack should feel solid, predictable, and consistent across all speeds—not something you need to constantly monitor while driving.
❓ FAQ: How to Install a Roof Rack on Your Car
Can I install a roof rack myself, or do I need a professional?
Yes, you can install a roof rack yourself if you follow the correct steps and use a system designed for your vehicle. Most setups don’t require special tools.
However, the key is not just installation—it’s proper alignment, even tightening, and correct fitment. That’s where most DIY setups go wrong.
If you’re unsure about compatibility or torque, it’s worth double-checking the manufacturer specs before installing.
How tight should a roof rack be?
A roof rack should feel firm and stable with zero movement, but not overtightened.
Too loose → leads to shifting and instability
Too tight → can damage your roof or mounting points
You’re aiming for even, controlled pressure—not maximum force. If your system includes a torque tool, always use it.
Do roof racks damage your car?
Not when installed correctly.
Damage usually happens when racks are overtightened, misaligned, or poorly fitted. This can lead to paint marks, compressed seals, or pressure points over time.
A properly installed system with correct pads and alignment will not damage your vehicle under normal use.
Why is my roof rack making noise?
Noise is almost always caused by:
misalignment of crossbars
uneven spacing
improper clamp tension
airflow disruption at speed
Even small installation errors can create whistling or humming at highway speeds, especially in crosswinds.
Fixing alignment and tightening evenly usually resolves the issue.
How far apart should roof rack crossbars be?
Crossbar spacing depends on your vehicle and what you’re carrying.
For most setups, manufacturers recommend a specific range based on roof length and load type.
Incorrect spacing can reduce stability, especially with cargo boxes or rooftop tents, and lead to uneven weight distribution.
Can I install a roof rack without roof rails?
Yes. Many vehicles with naked roofs use clamp-based systems or fixed mounting points.
The key is choosing a rack designed specifically for your roof type. Universal systems often lead to poor fitment and instability.
Do I need to re-tighten my roof rack after installation?
Yes—this is one of the most important steps.
After your first drive, especially at higher speeds, recheck all mounting points. Some components can settle slightly under real conditions.
Skipping this step is one of the most common reasons racks become loose over time.
Is it safe to drive on the highway with a roof rack?
Yes—if the rack is installed correctly.
A properly installed system should feel stable, predictable, and quiet, even at highway speeds.
If you notice noise, vibration, or movement, that’s a sign something needs adjustment before longer drives.
🏁 Final Thoughts: Installing a Roof Rack the Right Way

Installing a roof rack isn’t just about getting it onto your car—it’s about getting it right the first time so you don’t have to think about it later.
Because once you’re on the road, small setup mistakes don’t stay small.
They turn into noise, movement, and constant doubt about whether your gear is actually secure—especially at highway speeds or in crosswinds.
A properly installed roof rack should feel:
solid under pressure
quiet at speed
predictable under load
Not something you keep checking every time the wind picks up.
If you take the time to align it correctly, tighten it evenly, and verify it after real driving conditions, your setup becomes something you can trust—not something you have to manage.
And once your base is solid, everything you build on top of it performs better.
If you’re planning a complete system, start with
Best Roof Setup for Camping (Racks, Rooftop Tents & Load Systems Explained)
to understand how racks, crossbars, and gear work together as one setup.
And if you want to go deeper into load stability and noise control,
Best Crossbars for Roof Racks (Weight Capacity, Noise & Fit Tested)
breaks down how different bar designs affect real-world performance.
Start with a clean install. Build from there. And make sure your setup works where it actually matters—on the road.
✍️ About the Author: Field-Tested Roof Systems & Real-World Setup Experience
Anthony is a Senior Gear Analyst at CampComfortGuide, specializing in vehicle-based camping systems and real-world gear performance.
His work focuses on how equipment performs outside ideal conditions—on highways, in crosswinds, under load, and across long-distance travel—where installation quality and system design actually matter.
Over the past few seasons, he has tested roof rack setups across multiple vehicle types, including naked roofs, raised rails, and full load configurations with cargo boxes and rooftop tents. His evaluations prioritize real-world behavior over manufacturer specs, with a focus on stability, noise, and long-term reliability.
Testing includes:
highway-speed stability
wind noise under changing conditions
mounting security after extended drives
fitment accuracy across different roof types
The goal is simple: help readers build setups that are safe, stable, and reliable in real conditions—not just correct on paper.