Why roof racks make noise at high speed isn’t just about the rack—it’s about how airflow interacts with your entire setup.
Hi, I’m Anthony.
The first time I really noticed this was on a highway drive where everything felt fine at city speeds—but as soon as I pushed past 60–65 mph, a deep humming sound started building on the roof.
At first, I assumed something was loose.
I stopped, checked everything, tightened the mounts—everything looked perfectly secure.
But the noise didn’t go away.
In fact, it got worse the faster I drove.
Same rack. Same bars. Same setup—but a completely different result once speed increased.
That’s when it becomes clear:
👉 this isn’t a mounting problem—it’s an airflow problem.
Because here’s what most guides get wrong:
— they treat roof rack noise like a hardware issue
— they tell you to “tighten everything” or “remove the rack”
— but they don’t explain why the noise starts at speed
And that’s the key.
Roof rack noise isn’t random—it’s the result of how air moves over, under, and around your setup.
At low speeds, airflow is smooth and forgiving.
But at highway speeds:
— turbulence increases
— pressure zones form around crossbars and attachments
— and small design or installation flaws get amplified
That’s why a setup can feel completely silent at 40 mph—and unbearably loud at 70.
This guide breaks down what’s actually causing roof rack noise in real driving conditions—and how to fix it without guessing or trial and error.
As an Amazon Associate, we earn from qualifying purchases.

Table of Contents
⚡ Quick Answer: Why Roof Racks Make Noise at High Speed
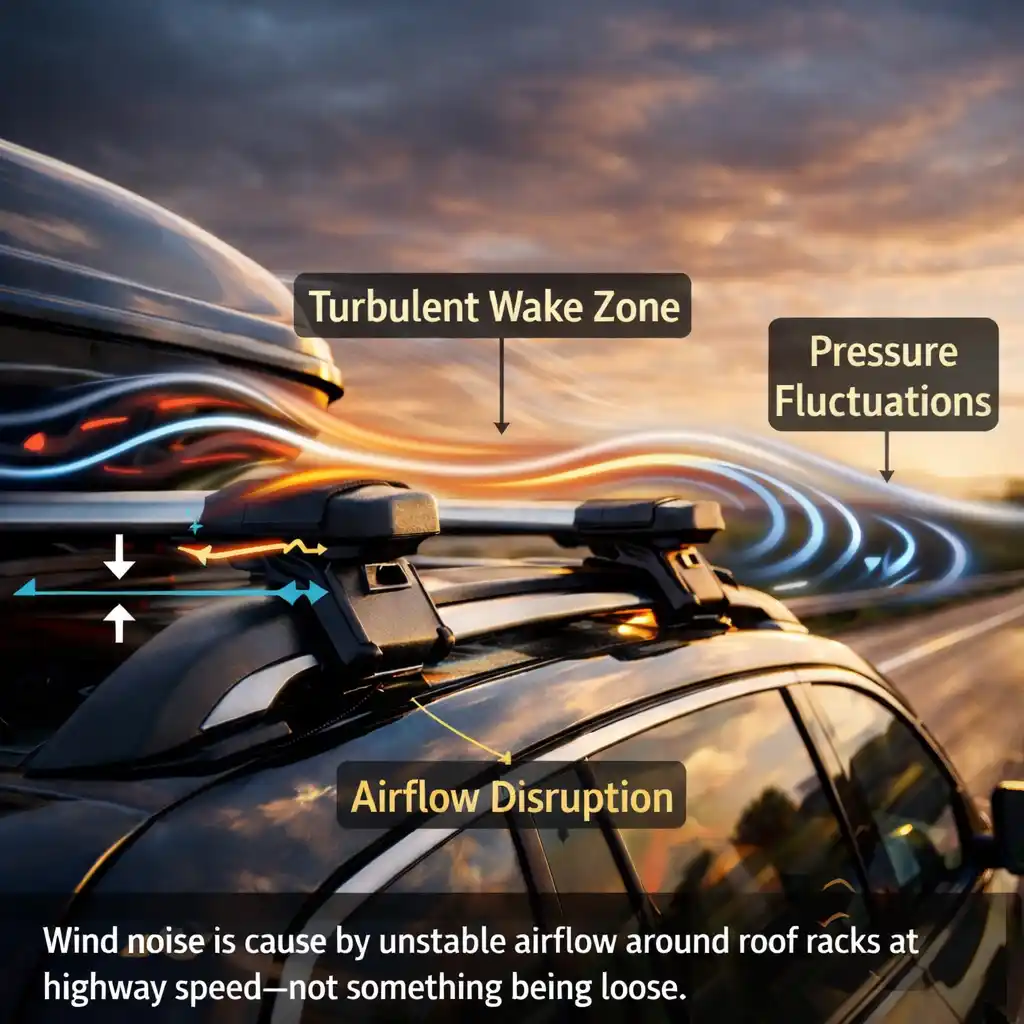
Roof racks make noise at high speed because airflow becomes turbulent as it passes over crossbars, mounts, and accessories, creating vibrations and pressure fluctuations that produce sound.
At lower speeds, air flows relatively smoothly.
But as speed increases:
— airflow separates around the bars
— turbulence forms behind components
— and small design or alignment issues become amplified
👉 This is why noise often starts suddenly around 50–70 mph—not gradually.
🧠 Quick Breakdown (What’s Actually Happening)
— Airflow disruption increases with speed
The faster you drive, the more unstable the airflow becomes around your roof setup.
— Crossbars act like obstacles
Flat or poorly shaped bars create resistance, causing air to split and form turbulence.
— Vortices form behind the rack
Swirling air pockets create pressure changes that you hear as humming or whistling.
— Small misalignment becomes a big problem
Even slight positioning issues can change airflow patterns dramatically at speed.
— Accessories make it worse
Cargo boxes, mounts, or uneven loads increase drag and amplify noise.
💡 Reality Check:
If your roof rack is quiet at low speeds but loud on the highway,
👉 your setup is not “broken”—it’s reacting to airflow under load.
🎯 What Most People Get Wrong
Most people assume roof rack noise means something is loose or poorly installed.
So they:
— tighten everything again
— check bolts and mounts
— or blame the rack quality
But in many cases, that’s not the real issue.
👉 A perfectly secure roof rack can still be loud at highway speeds.
❌ The Common Misdiagnosis
The biggest mistake is treating noise as a mechanical problem instead of an aerodynamic one.
People think:
— “something is vibrating”
— “something is loose”
— “this rack is just noisy”
But what’s actually happening is different:
👉 the airflow itself is unstable—and your rack is interacting with it.
🌬️ Why This Matters
At higher speeds, air doesn’t behave smoothly.
It separates, swirls, and creates pressure zones around objects—especially rigid ones like crossbars.
So even if:
— everything is tightened correctly
— the rack is high quality
— the installation is technically “correct”
👉 the setup can still generate noise if airflow isn’t managed properly.
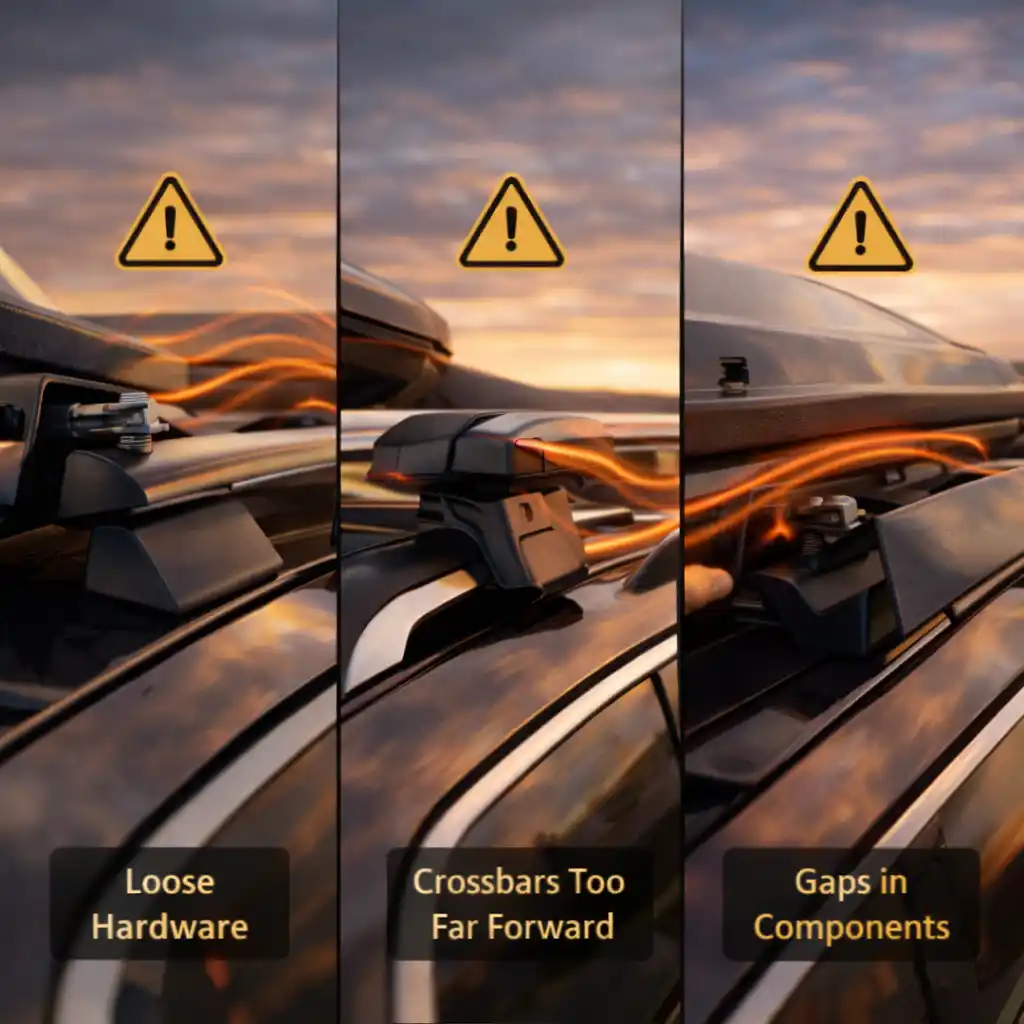
⚠️ Where Most Setups Go Wrong
Noise usually comes from small details people ignore:
— crossbars positioned too far forward
— gaps between components
— mismatched bar shape (flat vs aerodynamic)
— uneven load or empty mounts left exposed
Individually, these don’t seem like major issues.
But at speed:
👉 they change how air flows—and that’s where noise starts.
💡 Real-World Insight
If your rack feels solid but gets louder the faster you drive,
👉 you’re not dealing with a mounting problem—you’re dealing with airflow behavior.
🌬️ Airflow Is the Real Cause (Core Physics Explained Simply)
Roof rack noise isn’t random—it’s the result of how air behaves at speed.
And once you understand this, the problem becomes much easier to fix.
🌪️ What Happens to Air at Highway Speed
At low speeds, air flows relatively smoothly over your vehicle.
But as speed increases, airflow becomes unstable.
Instead of moving in a straight path, it starts to:
— separate around objects
— accelerate through gaps
— and form turbulent wake zones behind components
👉 This is where noise begins.
🔊 How Roof Racks Create Noise
Your roof rack sits directly in the path of high-speed airflow.
And every part of it affects how that air moves:
— crossbars interrupt smooth airflow
— mounts and brackets create pressure points
— gaps cause air to accelerate and whistle
— flat surfaces increase drag and turbulence
As air hits these elements, it breaks into uneven patterns.
👉 That creates pressure fluctuations—and your ears interpret that as sound.
🎵 Why It Sounds Like Humming or Whistling
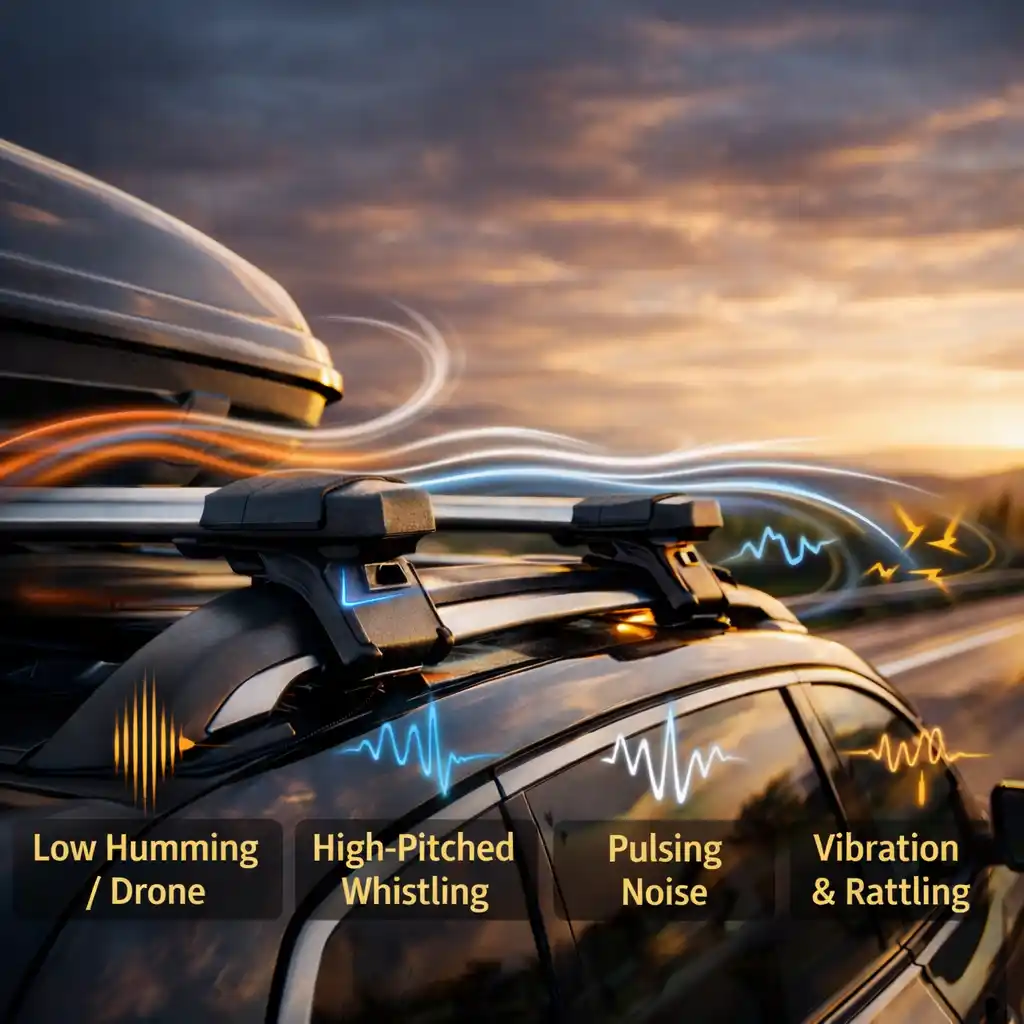
Different airflow patterns create different types of noise:
— low-frequency hum → large turbulent airflow zones
— high-pitched whistle → air squeezing through small gaps
— vibration noise → resonance caused by airflow hitting components
👉 The type of sound you hear often tells you exactly what’s causing it.
⚠️ Why Speed Changes Everything
At higher speeds:
— airflow energy increases dramatically
— turbulence becomes stronger
— pressure differences grow
That means:
👉 small design flaws that don’t matter at 40 mph become very noticeable at 65–75 mph.
As NASA’s explanation of the drag equation shows, aerodynamic drag rises with speed—so even small roof rack airflow problems become much more noticeable on the highway.
💡 Real-World Insight
Two setups can look almost identical—but behave completely differently on the highway.
Because even small differences in:
— bar shape
— spacing
— alignment
— or accessories
👉 can completely change airflow behavior.
🧠 Key Takeaway
Roof rack noise isn’t about parts—it’s about airflow.
👉 If you fix how air moves around your setup, the noise usually disappears.
⛽ Roof Rack Noise and Drag Are the Same Problem in Two Different Forms
Roof rack noise and aerodynamic drag come from the same source: unstable airflow.
When air hits crossbars, mounts, and exposed gaps at highway speed, it doesn’t just create sound—it also creates resistance.
That matters because:
— more turbulence usually means more drag
— more drag means the vehicle has to work harder
— and that usually shows up as both extra noise and reduced efficiency
👉 In simple terms: if your rack is loud, it’s usually also disrupting airflow enough to cost you some efficiency.
This is why quieter setups often feel better in more than one way:
— less cabin noise
— smoother airflow
— less aerodynamic penalty at speed
💡 Real-World Insight
A noisy rack is often a sign that air is being forced into unstable patterns instead of flowing cleanly over the roof.
Fixing the noise usually improves airflow overall—not just sound.
For a wider look at how airflow, load, and roof accessories interact as one system, see Best Roof Setup for Camping (Racks, Rooftop Tents & Load Systems Explained).
🔊 Different Types of Roof Rack Noise (And What They Mean)
Not all roof rack noise is the same.
And the type of sound you hear is one of the fastest ways to identify the real problem.
🎵 Low Humming or Deep Drone
👉 What it sounds like:
A steady, low-frequency hum that increases with speed.
👉 What it means:
— large turbulent airflow zones forming around the crossbars
— flat or non-aerodynamic bars disrupting airflow
— bars positioned too far forward on the roof
👉 Why it happens:
Air separates and creates a broad wake behind the bar, producing consistent pressure fluctuations.
✔ Most common cause:
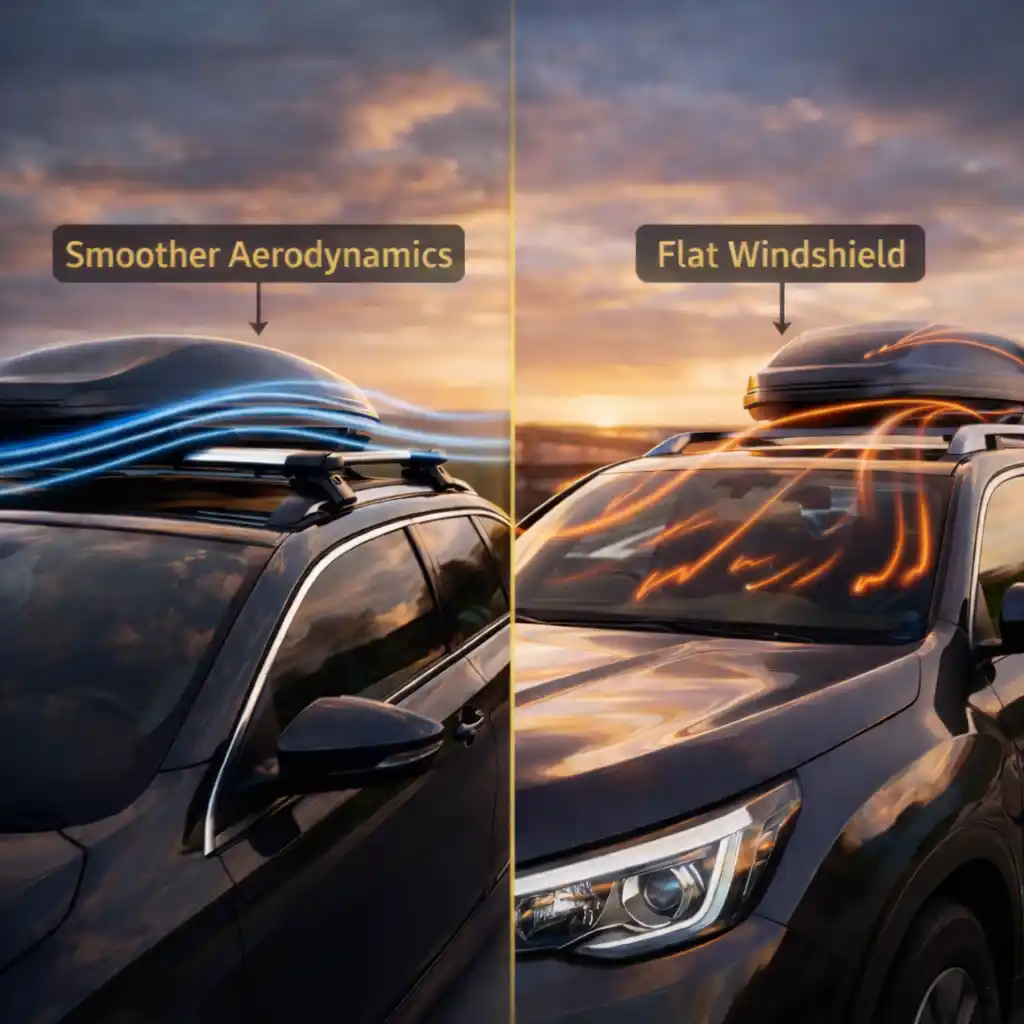
Flat crossbars or poor positioning relative to the windshield airflow.
🎯 High-Pitched Whistling
👉 What it sounds like:
A sharp whistle that may come and go depending on speed or wind angle.
👉 What it means:
— air passing through small gaps or openings
— exposed mounting slots or channels
— poorly sealed accessories
👉 Why it happens:
Air accelerates through narrow spaces, creating a whistling effect (similar to blowing across a bottle).
✔ Most common cause:
Open T-slots or gaps in crossbars and mounts.
🔁 Pulsing or Rhythmic Noise
👉 What it sounds like:
A repeating “whoop-whoop” or fluctuating sound pattern.
👉 What it means:
— unstable airflow interacting with multiple components
— uneven spacing between bars
— interference between rack and accessories
👉 Why it happens:
Airflow repeatedly separates and reconnects, creating oscillating pressure zones.
✔ Most common cause:
Improper spacing between front and rear crossbars.
🪵 Vibration or Rattling Sound
👉 What it sounds like:
A light rattling or vibration, often inconsistent.
👉 What it means:
— actual movement or resonance in components
— loose accessories (not always the rack itself)
— airflow-induced vibration
👉 Why it happens:
Airflow energy transfers into physical movement or resonance.
✔ Most common cause:
Loose mounts, accessories, or poorly secured attachments.
⚠️ Mixed Noise (Most Real-World Cases)
In real driving conditions, you’ll often hear a combination of these sounds.
That’s because:
— multiple airflow issues can exist at once
— different parts of the rack interact with airflow differently
— speed and wind direction constantly change conditions
👉 This is why guessing the problem rarely works.
💡 Real-World Insight
If you can identify the type of noise,
👉 you’re already halfway to fixing it.
Because each sound points to a specific airflow issue—not just a general “noisy rack.”
⚠️ The “Speed Threshold Effect” (Why Noise Starts Suddenly)
Roof rack noise doesn’t always build gradually.
In many cases, it appears suddenly—at a specific speed.
🚗 What Most Drivers Notice
You’re driving, and everything feels fine.
Then suddenly:
— a hum appears
— or a whistle starts
— or the noise sharply increases
👉 often around 50–70 mph
And it feels like something just “turned on.”
🌪️ What’s Actually Happening
This isn’t random.
It’s the point where airflow crosses a threshold.
Below that speed:
— airflow remains relatively stable
— turbulence is limited
— pressure differences are small
But once speed increases:
— airflow energy rises
— turbulence becomes unstable
— pressure zones intensify
👉 and the system crosses into a new airflow behavior
🔊 Why the Noise Feels Instant
The noise doesn’t appear because something changed physically.
It appears because:
👉 the airflow pattern itself has changed.
Your setup was already interacting with air—but once speed increases enough:
— vortices become stronger
— airflow separation becomes more aggressive
— resonance effects kick in
👉 and suddenly, you hear it.
⚠️ Why Small Issues Get Amplified
This is where most setups fail.
Even minor imperfections like:
— slight misalignment
— small gaps
— non-aerodynamic shapes
👉 don’t matter much at low speed
But once you hit that threshold:
👉 they become major noise sources.
💡 Real-World Insight
If your roof rack is:
— silent at 40 mph
— tolerable at 55 mph
— loud at 65+ mph
👉 that’s not a coincidence—that’s the threshold effect in action.
🧠 Key Takeaway
Roof rack noise isn’t linear.
👉 It’s threshold-based.
And once you cross that speed,
your setup either handles airflow well—or it doesn’t.
🚗 Why Some Cars Are Noisier Than Others
The same roof rack can sound very different on different vehicles.
That’s because roof rack noise is not only about the rack—it’s also about the shape of the car underneath it.
The biggest variables are:
— windshield angle
— roof height
— roofline length
— how quickly airflow transitions from windshield to roof
Vehicles with steeper windshield transitions or shorter roof sections often push more turbulent air directly into the front crossbar zone.
That means:
— a setup that feels quiet on one SUV can be noticeably louder on another
— shorter rooflines often make front bar positioning more sensitive
— taller vehicles can amplify airflow interaction around the rack
💡 Real-World Insight
If you copied someone else’s “quiet” setup but your vehicle still makes noise, the difference may not be the rack at all—it may be the airflow shape of your vehicle.
🧪 How to Identify the Source of the Noise
Before you try to fix roof rack noise, you need to understand exactly where it’s coming from.
Because guessing usually leads to the wrong fix.
🔍 Step 1: Listen to When the Noise Starts
The speed at which noise begins tells you a lot.
— Below 50 mph → usually quiet
— 50–65 mph → airflow instability begins
— 65+ mph → full turbulence and noise amplification
👉 If noise appears suddenly at a specific speed, you’re dealing with airflow—not loose hardware.
🎯 Step 2: Identify the Type of Sound
Use the sound itself as your first diagnostic tool:
— Low hum → crossbar shape or positioning
— Whistle → gaps or open slots
— Pulsing noise → spacing issue
— Rattle → possible loose component
👉 The sound pattern points directly to the cause.
🧭 Step 3: Check Crossbar Positioning
Position matters more than most people think.
Pay attention to:
— distance from the windshield
— spacing between front and rear bars
— alignment across the roof
👉 Bars placed too far forward often sit in turbulent airflow coming off the windshield—this is one of the biggest noise triggers.
🧱 Step 4: Inspect Exposed Gaps and Channels
Look closely at your setup:
— open T-slots on crossbars
— gaps between mounts and bars
— unused attachment points
👉 These act like air tunnels—and can create high-pitched whistling.
⚖️ Step 5: Evaluate What’s Mounted (or Not Mounted)
Noise often changes depending on load:
— empty bars → more exposed airflow → more noise
— uneven load → disrupted airflow balance
— bulky accessories → increased drag and turbulence
👉 Sometimes adding or removing an accessory changes noise dramatically.
🔧 Step 6: Do a Simple Real-World Test
The fastest way to isolate the issue:
— drive at the speed where noise starts
— slightly open a window (changes cabin pressure)
— remove one component at a time (if possible)
👉 Small changes can reveal exactly what’s causing the noise.
💡 Real-World Insight
If you change one variable at a time,
👉 you can identify the exact source of the noise in a single drive.
🧠 Key Takeaway
Roof rack noise is predictable.
👉 If you understand where it’s coming from, fixing it becomes straightforward—not trial and error.
🛠️ How to Fix Roof Rack Noise (Step-by-Step)
Once you understand what’s causing the noise, fixing it is usually straightforward.
The key is to address airflow—not just tighten parts.
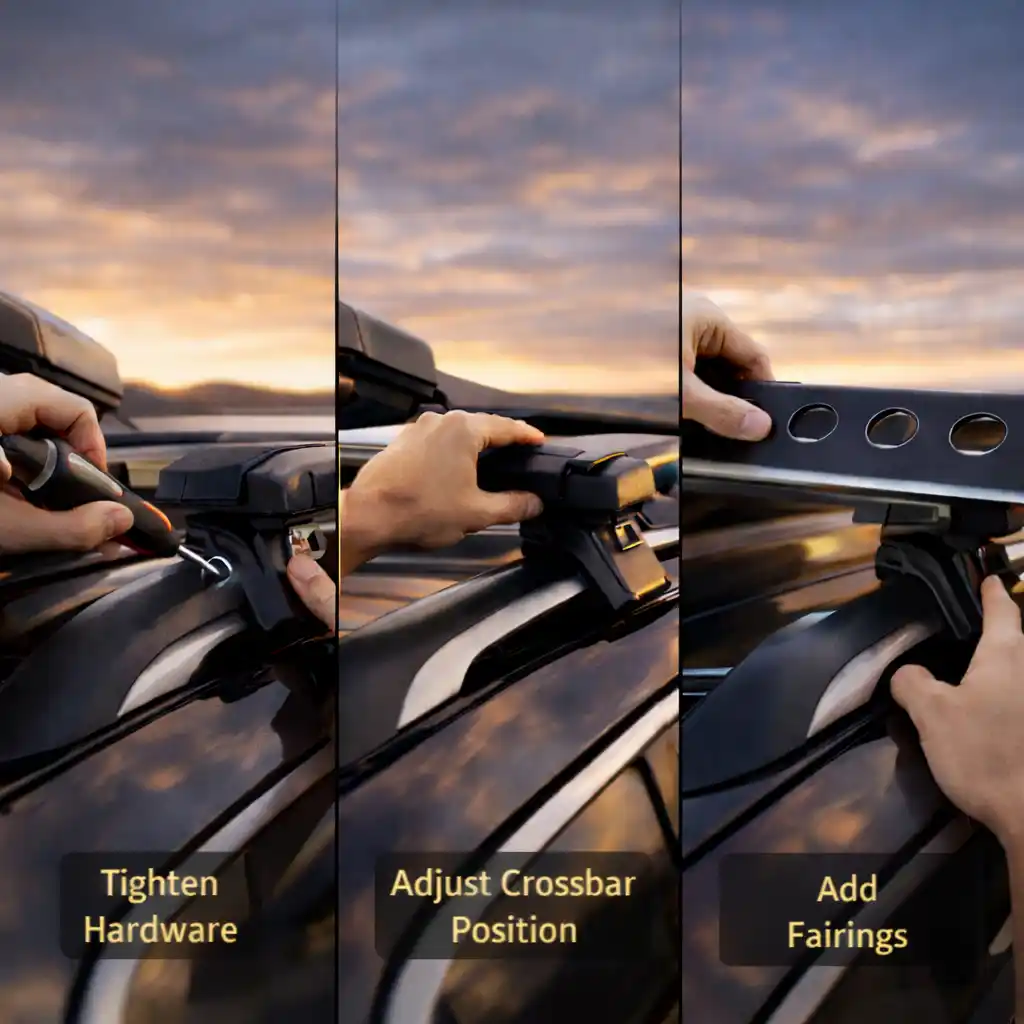
🔧 1. Adjust Crossbar Position (Most Effective Fix)
This is often the biggest improvement you can make.
👉 What to do:
— move the front crossbar slightly backward from the windshield
— avoid placing bars directly in turbulent airflow zones
— keep spacing consistent and balanced
👉 Even a small adjustment (1–2 inches) can significantly reduce noise.
💡 This is one of the most common real-world fixes (see How to Install a Roof Rack on Your Car (Step-by-Step Safe Setup Guide)).
🌬️ 2. Use a Wind Fairing
A wind fairing redirects airflow over the rack.
👉 What it does:
— reduces direct airflow impact
— minimizes turbulence
— smooths airflow transition
👉 Especially effective if your bars sit close to the front of the roof.
✔ Best for: humming and general wind noise
🧩 3. Close Gaps and Open Channels
Small gaps create big noise problems.
👉 Fix:
— install rubber inserts in T-slots
— cover exposed channels
— seal unused mounting points
👉 This is one of the main causes of high-pitched whistling.
📏 4. Switch to Aerodynamic Crossbars
Bar shape makes a major difference.
👉 Flat bars:
— create more drag
— increase turbulence
👉 Aerodynamic bars:
— guide airflow smoothly
— reduce noise significantly
👉 If noise is constant, your bar shape may be the limiting factor (see Best Crossbars for Roof Racks (Weight Capacity, Noise & Fit Tested)).
⚖️ 5. Rebalance or Add Load
It sounds counterintuitive—but empty racks are often louder.
👉 Why:
— airflow hits exposed bars directly
— no surface to guide air smoothly
👉 Fix:
— add a cargo box or gear
— distribute weight evenly
— avoid asymmetrical setups
👉 A well-balanced load can actually reduce turbulence.
🔩 6. Check for Micro-Movement (Not Just Loose Parts)
Even if everything feels tight, small movement can create noise.
👉 Check:
— mounts under load
— clamps after highway driving
— accessory connections
👉 Tighten—but avoid overtightening, which can distort alignment.
⚠️ 7. Remove Unused Components
Every exposed part affects airflow.
👉 Remove:
— unused mounts
— empty attachments
— unnecessary accessories
👉 Cleaner setup = smoother airflow.
🛠️ 8. Remove the Rack Entirely When You Don’t Need It
Sometimes the quietest fix is the simplest one.
If you’re not using the rack regularly:
— remove the bars
— remove unused accessories
— keep the roofline clean between trips
👉 This is often the best solution for daily driving, because even a well-designed rack still changes airflow.
✔ Best for: commuters, seasonal users, and anyone who only needs the rack occasionally
💡 Real-World Insight
In most cases, roof rack noise is fixed by:
— adjusting bar position
— closing gaps
— improving airflow
👉 not by replacing the entire system.
🧠 Bottom Line
If your roof rack is noisy at high speed:
👉 you don’t need a new rack—you need a better airflow setup.
❌ Common Installation Mistakes That Cause Noise
Most roof rack noise isn’t caused by bad equipment.
It’s caused by small installation mistakes that affect airflow in ways most people don’t notice.
🚫 1. Placing Crossbars Too Far Forward
This is one of the most common mistakes.
👉 What happens:
— bars sit directly in turbulent airflow from the windshield
— air hits them at a steep angle
— turbulence increases immediately
👉 Result: loud humming or buffeting at speed
✔ Fix: move the front bar slightly backward
🚫 2. Ignoring Crossbar Spacing
Spacing between bars affects how airflow behaves across your setup.
👉 Too close:
— airflow becomes compressed
— turbulence increases
👉 Too far apart:
— airflow becomes unstable between bars
👉 Result: pulsing or fluctuating noise
✔ Fix: use manufacturer-recommended spacing as a baseline
🚫 3. Leaving Open Channels and Gaps
Many setups have exposed T-slots or mounting gaps.
👉 What happens:
— air accelerates through narrow openings
— creates whistling noise
👉 Result: high-pitched, annoying sound at speed
✔ Fix: use rubber inserts or covers
🚫 4. Mixing Incompatible Components
Not all racks and accessories are designed to work together.
👉 What happens:
— uneven airflow
— misalignment between components
— increased drag
👉 Result: unpredictable noise patterns
✔ Fix: use compatible systems or ensure proper alignment
🚫 5. Overtightening (Yes, Really)
This is rarely mentioned—but it matters.
👉 What happens:
— bars can slightly deform
— alignment shifts
— airflow becomes uneven
👉 Result: subtle but persistent noise
✔ Fix: tighten to spec—not beyond it
🚫 6. Leaving the Rack Empty Long-Term
An empty rack often creates worse airflow than a loaded one.
👉 What happens:
— air hits exposed bars directly
— no surface to guide airflow
👉 Result: constant wind noise
✔ Fix: remove rack when not needed or add fairing/load
💡 Real-World Insight
Most “noisy rack” complaints come from setups that are:
— slightly mispositioned
— slightly misaligned
— or slightly incomplete
👉 Not broken—just not optimized.
🧠 Key Takeaway
Roof rack noise is rarely caused by one big mistake.
👉 It’s usually several small ones that affect airflow together.
📊 Quick Fix Table (Cause → Solution)
| Cause | What Happens | How to Fix It |
|---|---|---|
| Crossbars too far forward | Turbulent airflow hits bars directly | Move front bar slightly backward |
| Flat or non-aerodynamic bars | Increased drag and turbulence | Switch to aerodynamic crossbars |
| Open slots or gaps | Air creates whistling noise | Install rubber inserts or covers |
| Poor bar spacing | Unstable airflow patterns | Adjust spacing to recommended range |
| Empty roof rack | Direct airflow impact increases noise | Add load or remove rack |
| Loose or vibrating components | Rattling or resonance noise | Tighten and secure all mounts |
| Misaligned setup | Uneven airflow and pressure zones | Realign crossbars and accessories |
❓ FAQ — Why Roof Racks Make Noise at High Speed
Why does my roof rack make noise only at high speed?
Roof racks make noise at high speed because airflow becomes turbulent as velocity increases. At lower speeds, air flows smoothly, but above 50–70 mph, turbulence and pressure fluctuations create noticeable sound.
At what speed do roof racks start making noise?
Most roof racks start making noise between 50 and 70 mph, depending on bar shape, positioning, and accessories. This is when airflow typically becomes unstable enough to generate turbulence.
Is roof rack noise normal?
Yes, some level of noise is normal at highway speeds. However, excessive humming, whistling, or vibration usually indicates airflow issues, poor positioning, or small installation problems.
Why is my roof rack whistling?
A whistling roof rack is usually caused by air passing through small gaps, open T-slots, or exposed mounting points. The airflow accelerates through these narrow spaces and produces a high-pitched sound.
Do aerodynamic crossbars really reduce noise?
Yes, aerodynamic crossbars significantly reduce noise by guiding airflow more smoothly over the rack. Compared to flat bars, they create less turbulence and lower drag at high speeds.
Does adding a cargo box reduce roof rack noise?
In many cases, yes. A cargo box can smooth airflow over the roof and reduce turbulence around crossbars, which may decrease noise. However, poor positioning can also make it worse.
👉 For real-world examples of how load affects airflow, see Best Rooftop Cargo Boxes for Camping Gear (2026 Field-Tested: Quiet, Durable, Spacious).
Why is my roof rack louder when it’s empty?
An empty roof rack exposes crossbars directly to airflow, increasing turbulence and noise. Adding a load or removing the rack entirely often reduces wind noise.
Can a wind fairing eliminate roof rack noise completely?
A wind fairing can significantly reduce noise by redirecting airflow, but it usually won’t eliminate it completely. Proper positioning and setup still matter.
How do I make my roof rack quieter without removing it?
To reduce roof rack noise without removing it:
— adjust crossbar position
— close gaps and open channels
— use aerodynamic bars
— add a wind fairing
— rebalance or add load
👉 Most noise issues can be fixed without replacing the entire system.
🏁 Final Verdict — Why Roof Racks Make Noise at High Speed
If your roof rack makes noise at high speed, it’s not a defect—and it’s usually not a quality issue.
It’s airflow.
At highway speeds, air becomes unstable, pressure zones form, and even small imperfections in your setup get amplified.
That’s when noise appears.
🧠 What Actually Matters
Roof rack noise isn’t about one component.
It’s about how everything works together:
— crossbar shape and position
— airflow around your vehicle
— gaps, mounts, and accessories
— how your setup interacts with speed
If one part disrupts airflow, the entire system becomes louder.
⚡ The Simple Truth
If your rack is:
— quiet at low speeds
— loud on the highway
👉 your setup is not broken—it’s not optimized for airflow.
🔧 What Fixes It in Real Conditions
In most real-world cases, noise is reduced by:
— adjusting crossbar position
— closing gaps and exposed channels
— improving airflow with better bar shape or accessories
— removing or simplifying unnecessary components
👉 Not by replacing the entire rack.
💡 Final Takeaway
The best roof rack setups aren’t just strong and secure.
They’re quiet at speed—because airflow is controlled, not disrupted.
👉 Once your setup works with airflow instead of against it, the noise disappears—or becomes barely noticeable.
🏁 Final Verdict — Why Roof Racks Make Noise at High Speed
If your roof rack makes noise at high speed, the problem usually isn’t the rack itself—it’s how your setup is interacting with airflow.
At city speeds, many racks feel quiet enough to ignore.
But once you reach normal highway speed:
— turbulence increases
— pressure zones form around bars, mounts, and accessories
— and small setup flaws become much more noticeable
That’s why a rack can feel perfectly fine at 40 mph and suddenly become loud at 65+ mph.
What actually matters
A quieter roof setup usually comes down to:
— better crossbar positioning
— fewer open gaps and exposed channels
— smoother airflow over the roofline
— fewer unnecessary components left exposed
If your rack is noisy on the highway, the fix is usually aerodynamic—not mechanical.
👉 In most real-world cases, you do not need a new rack.
You need a cleaner, better-matched airflow setup.
👤 About the Author
Anthony is a Senior Gear Analyst at CampComfortGuide, specializing in real-world testing of vehicle-based camping setups and roof systems.
His work focuses on how gear performs under real driving conditions—not just static specs, but how setups behave at highway speeds, in crosswinds, and over long-distance travel. This includes airflow behavior, noise patterns, load stability, and how different components interact as a complete system.
Field testing spans thousands of miles across varying environments, from open highways with sustained crosswinds to mountain routes where airflow conditions constantly change. The goal is always the same: identify what actually works in real conditions—and what doesn’t.
At CampComfortGuide, all gear is tested independently and purchased at retail. No sponsored placements. No paid rankings.
The approach is simple: break down complex systems into real-world behavior—and help build setups that are stable, efficient, and quiet at speed.